V-Ray has more render settings than most architects will ever touch, and the truth is you only need a handful of them.
Plenty of thorough V-Ray courses cover everything but will take weeks to complete. This guide does the opposite: it strips things down to the settings that actually matter for architecture and interior design, so you know what to change, what to leave on default, and the specific values that work for interior vs exterior scenes.
Let's dive in.
There’s no single “best” V-Ray setting for every project. The right setup depends on several key factors, including the type of scene, your deadline, available hardware, and the required output quality.
In architectural visualization, scenes are typicaly categorized as interior or exterior, and each behaves differently when it comes to lighting and rendering.
This distinction drives most of the settings differences covered below.
Interior scenes involve multiple materials, enclosed spaces, and limited natural light, making them more complex to render. Exterior scenes, on the other hand, rely heavily on natural lighting to highlight the building’s form and surroundings.

Because of these differences, several settings need to be adjusted depending on whether you’re rendering indoors or outdoors, including:
The deadline of your rendering project determines what you should prioritize: speed or quality. For tighter deadlines, the goal is to produce acceptable results as quickly as possible. When more time is available, you can prioritize cleaner, higher-quality renders.
These settings have the biggest impact on render speed and quality, and they are typically adjusted as follows:
Your hardware doesn’t just affect render speed. It should also influence how you configure your V-Ray settings.
If you’re working on a budget workstation that only meets the minimum requirements for V-Ray, pushing settings to their highest levels can actually lead to poor performance or instability. In most cases, the main limitation is memory. For example, if you have 8GB of VRAM (which may be enough for basic scenes), you should avoid rendering highly complex scenes with large numbers of assets, as this can quickly exceed available memory.
Tip: You can monitor memory usage through the V-Ray Frame Buffer to help prevent crashes and optimize performance.
Other hardware factors that can limit rendering performance include system RAM, cooling capacity, and power supply stability. Read our V-Ray system specs guide for more details.
Not all renders need to be produced at the highest possible quality. The required settings should depend on the intended use of the output, from drafts to V-Ray photorealistic render settings for final delivery.
V-Ray's default render settings let you start rendering without changing anything, as long as the default configuration meets your quality requirements.
The Chaos team recommends using the default settings as a baseline. From there, you can make adjustments depending on your specific needs, balancing quality and render speed.

Beyond the default settings, V-Ray also provides render quality presets ranging from Low to High+. These presets automatically adjust key parameters such as: noise limit, max subdivs, light cache subdivs, and light cache retrace.
Once you manually increase or modify these values beyond the preset limits, the quality mode will automatically switch to Custom.
When to use each preset:
Limitations of quality presets
While these presets provide a solid starting point, they are not optimized for every scene. Some projects may still require manual adjustments even when using Low or Medium presets, especially in complex lighting or material setups. The same applies to client and final renders.
How to use presets effectively
If you are unsure which settings to use, start with a preset as your baseline. Once you evaluate the output, you can refine the result by manually adjusting the settings as needed to achieve the right balance between speed and quality.
Core V-Ray settings are the ones most commonly used during rendering, including V-Ray camera settings, sampling, and resolution. After you setup V-Ray in 3ds Max, SketchUp, or your design application of choice, you’ll typically adjust these settings based on your project needs before starting the render.
Note that some settings may not be available, may be named differently, or may behave differently across host applications (e.g., SketchUp, 3ds Max, Maya, Rhino, Revit).
Below are common settings found across all V-Ray integrations.
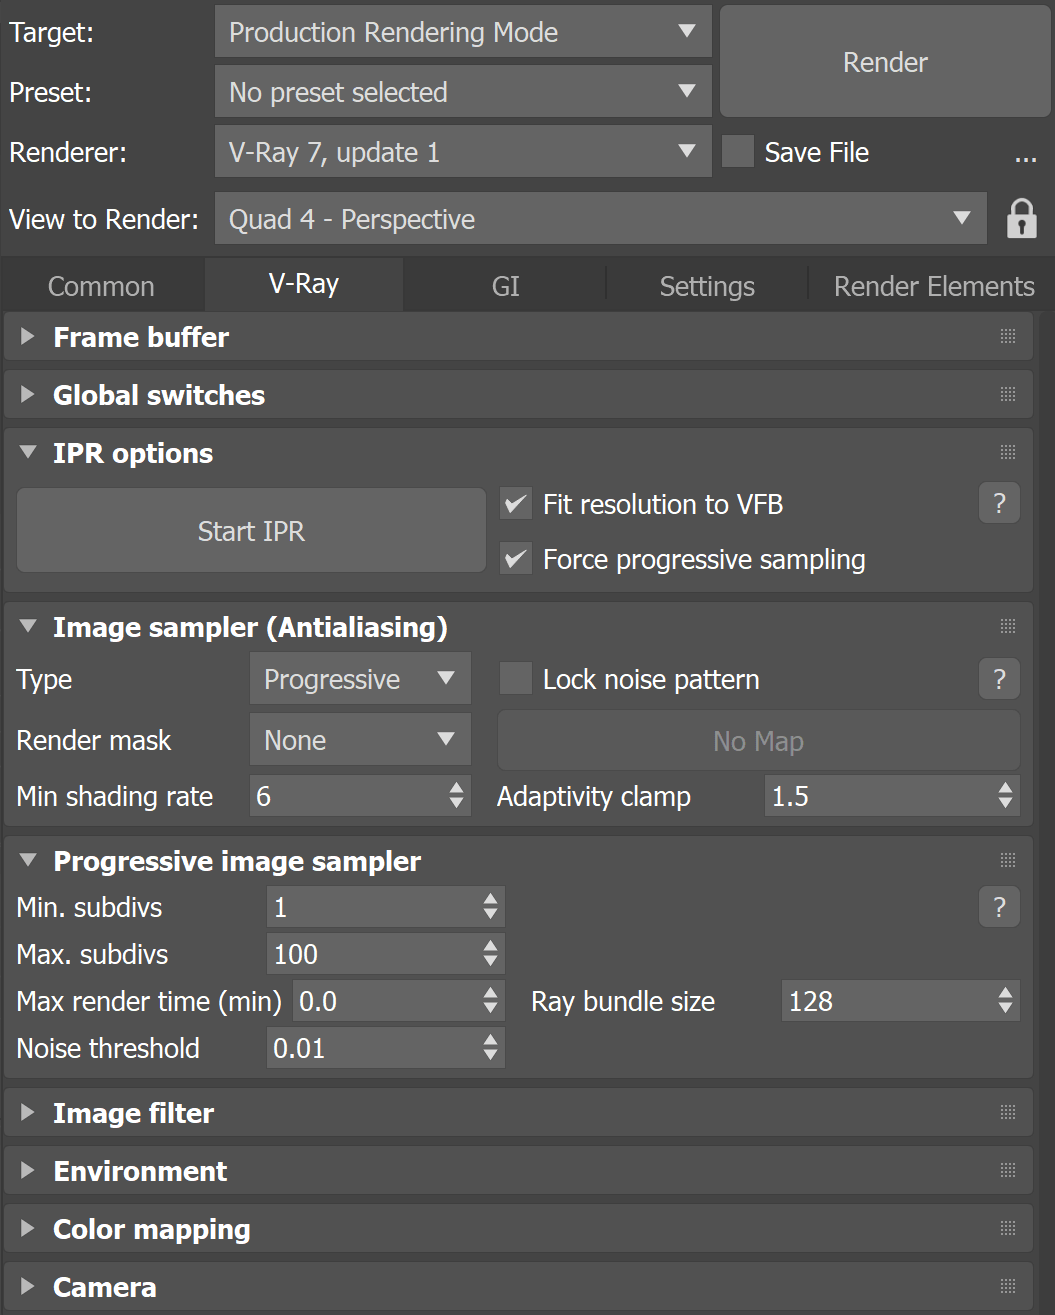
This is what produces the colors in every pixel of the final render.
V-Ray checks multiple points within and around each pixel to see how objects, materials, and lighting affect the color. It then averages those results to get the final color of that pixel. The more samples or checks, the longer the render will take to complete, but the more accurate the colors will be.
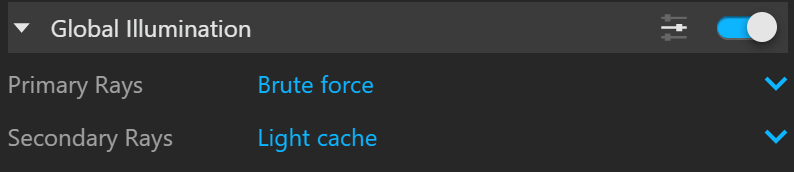
This refers to all indirect lighting bouncing around your scene.
When to use Global Illumination
For final renders. This makes your render look more natural and properly demonstrates how light sources interact with your interiors or exteriors, an essential part of design.
When to disable Global Illumination
Enabling GI requires your hardware to perform more calculations. For test renders where you don’t need to see how indirect lighting behaves, it’s best to keep it turned off for faster renders.

V-Ray offers different types of light sources, including area lights, sunlight, photometric lights, and ambient light. You can control how strong the lights are, how they behave with the surroundings, and how they appear in your final render. Below are the common parameters. These may vary depending on the light type.
Key lighting parameters:
Tip: For exterior scenes, use HDRI lighting and combine it with V-Ray Sun for better control, especially when working with HDRI 3ds Max V-Ray workflows.
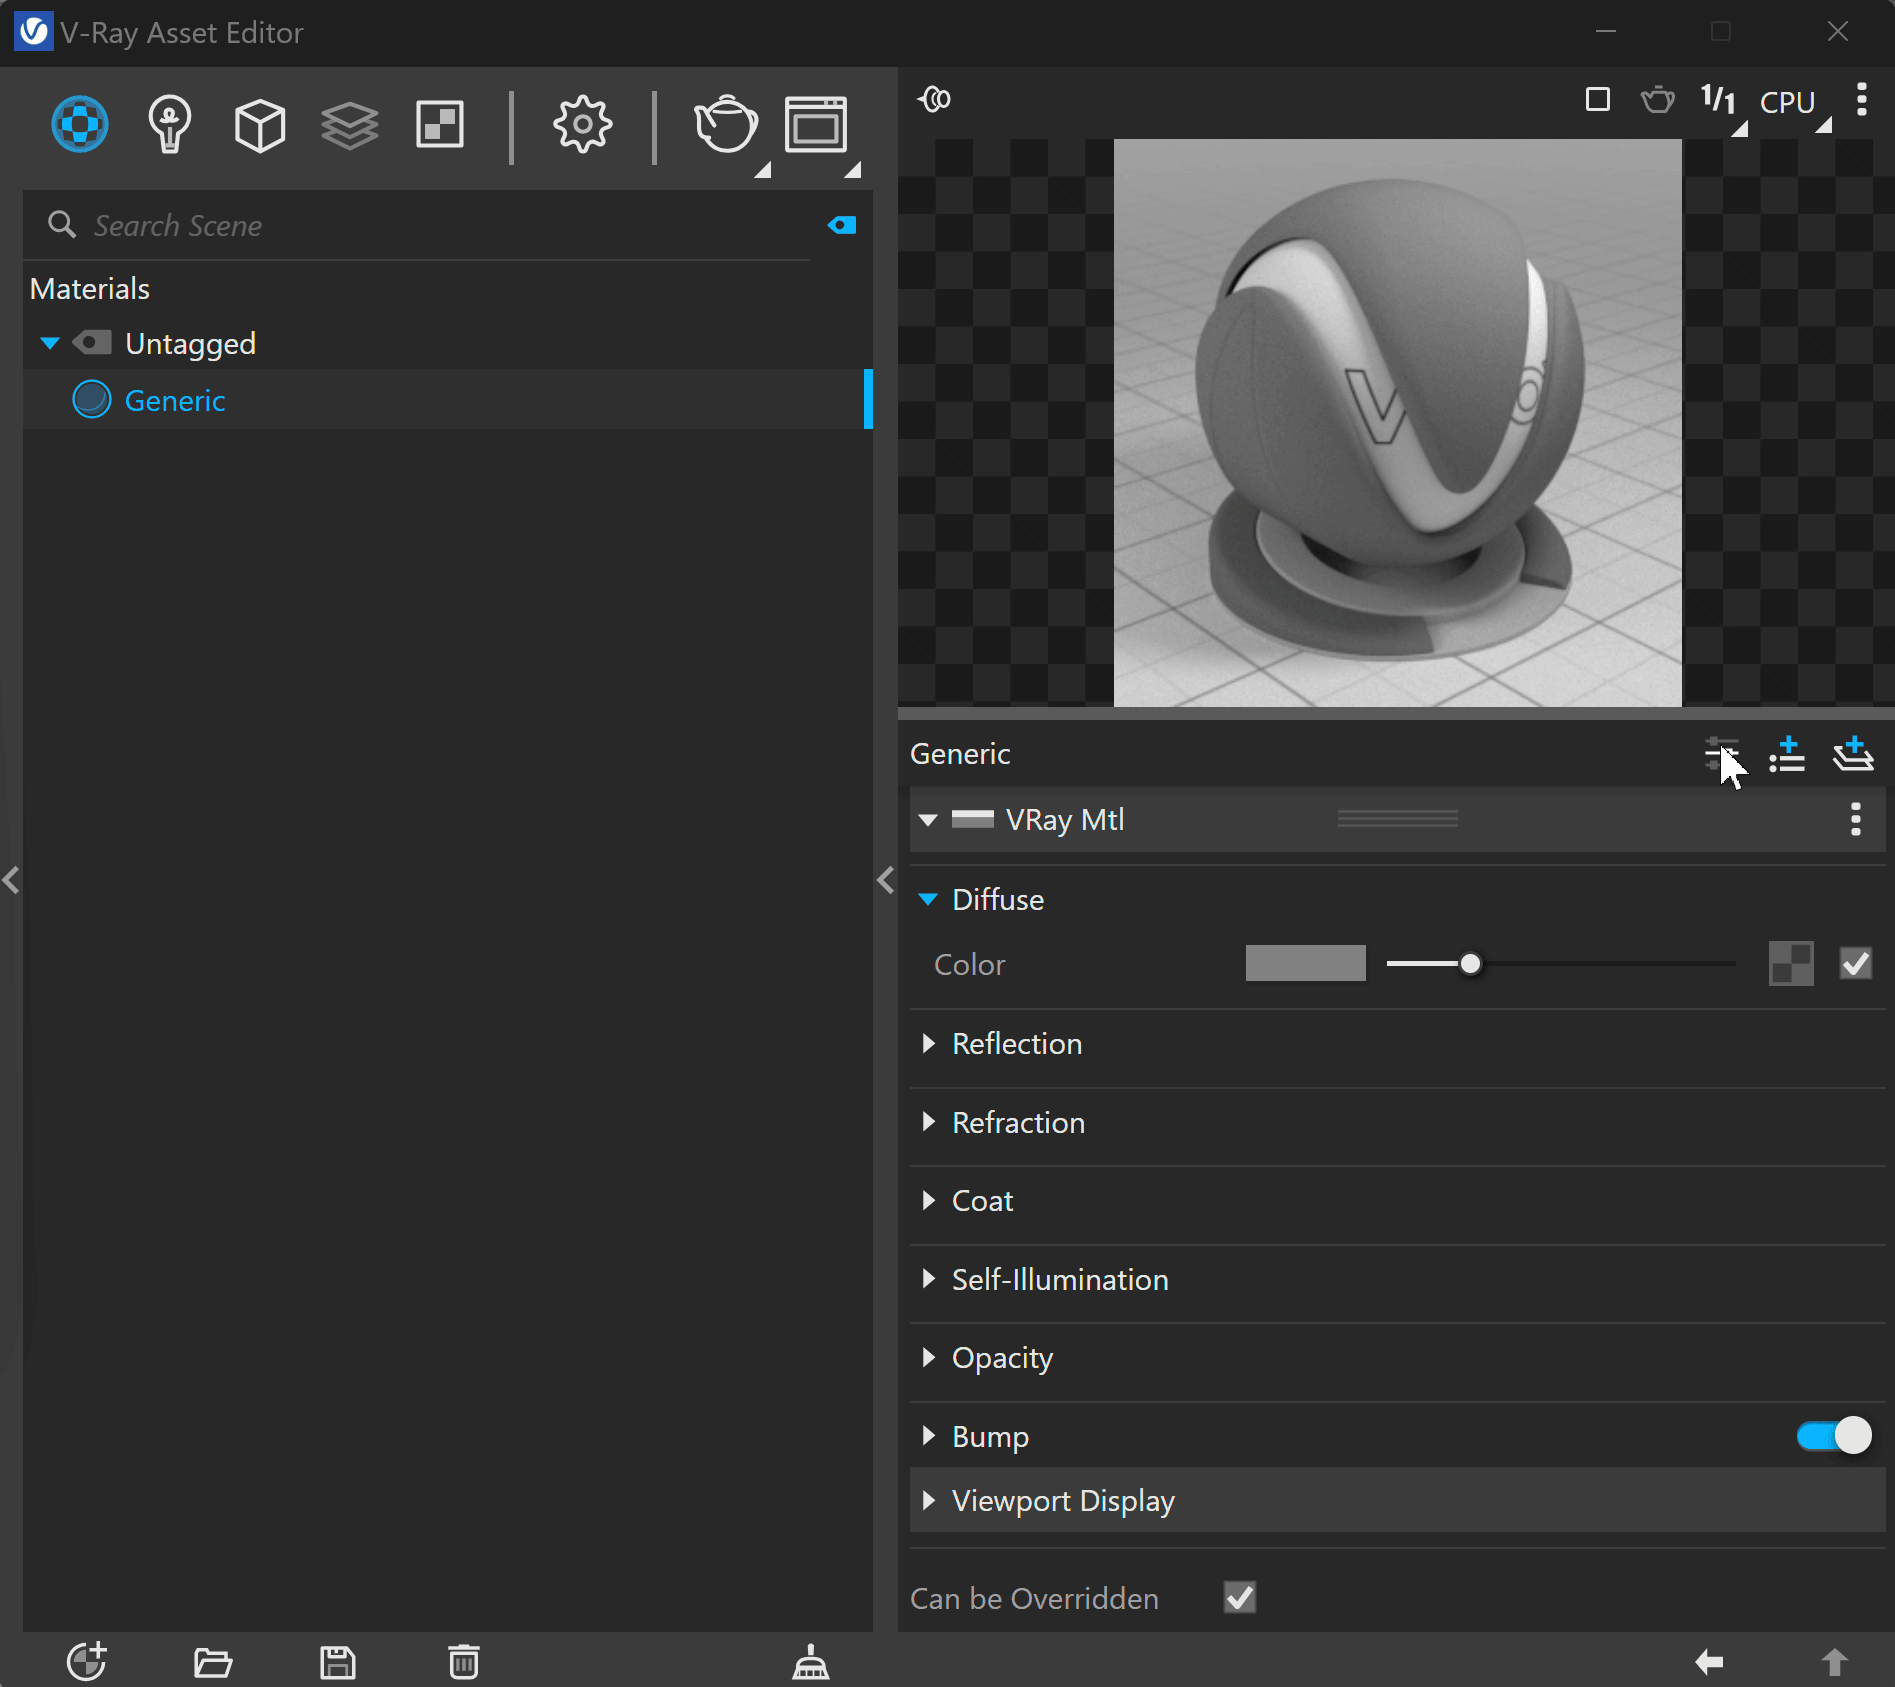
V-Ray supports a wide range of materials across host platforms, including metals, plastics, wood, and glass. All of these material types are highly customizable, giving you virtually endless options. Each material has its own set of parameters, but in this guide, we’ll focus on V-RayMtl.
Some of these parameters are also available in other V-Ray material types. If you want to learn more about settings for other materials, refer to the V-Ray documentation.
Common parameters:
Chaos published a guide showing universal settings for V-Ray that will work for still images in almost any situation and require minimal tweaking. These settings are useful because they need little optimization, can produce fast renders, and still deliver good-quality results.
Starting with V-Ray’s default settings, only a few parameters need to be adjusted:
Tip: Do not use AA filters, as they can make noise more noticeable.
The denoiser removes grain from your renders without cranking up sample counts, which means shorter render times for the same visual quality. V-Ray comes with two options:
.png)
For production renders, pair the V-Ray Denoiser with a moderate noise threshold (0.005–0.01) rather than leaning on OptiX alone, which can soften fine detail in materials like fabric or stone.
Match your render resolution to how the image will be used:
For file format, go with PNG when you need transparency or will composite later, JPEG for quick sharing, and EXR when the render needs post-processing (exposure correction, color grading) in Photoshop or similar.
V-Ray render settings are not one-size-fits-all. What works for an exterior scene will not always produce the same quality or efficiency for an interior, mainly due to differences in lighting.
Exterior scenes benefit from abundant natural light (typically using V-Ray Sun and HDRI), making them easier to render, cleaner, and faster to calculate.
Recommended settings for exteriors:
Interiors rely on limited light entering through windows and artificial sources, making them more complex. Light has to bounce multiple times inside the space, which increases noise and render times.
Recommended settings for interiors:
V-Ray's render settings allow you to achieve both fast renders and high-quality outputs. However, it is not always practical to rely solely on manual V-Ray settings.
Here's why.
Every rendering project has its own requirements. You cannot always rely on presets or previous settings. The time spent tweaking settings varies depending on experience, but for beginners, it can be overwhelming. In real-world workflows, tight deadlines are common, and settings optimization can consume a significant amount of time.
You might wait hours for a render to finish, only to redo it because the result is not satisfactory. Trial-and-error is baked into V-Ray workflows — you iterate until the result looks right. The problem is that each iteration costs time you could spend on actual design work.
Optimization, trial-and-error, and the rendering process itself are all time-consuming. A full render can take hours or even days to complete. While this may be manageable for a single project on one workstation, it becomes inefficient when handling multiple projects. The result: lower throughput and inconsistent quality across projects.
This is why most designers these days are turning to AI-assisted rendering tools, which automatically handle scene setup, materials, and lighting, reducing the need for repeated manual tuning while still maintaining production-quality outputs.
There is no universal “best” V-Ray setting. Everything depends on your scene and your goals. While presets can help, relying on them too heavily may limit the potential of your final output.
It also helps to remember that you don’t need a very high quality render all the time. Low quality settings are sufficient for drafts and can save you a lot of time. Medium quality settings are best for client presentations as long as you’re able to communicate your idea without compromise. Leave high quality renderings for final renders or marketing stills.
The V-Ray render settings that have the biggest impact on quality are noise threshold (lower it for a smoother image with fewer speckles) and GI bounces. Also, make sure your lighting assets are properly highlighting your space, use textures or materials appropriate to your scene and enable Global Illumination with a higher number of bounces.
Neither is strictly better. It depends on your needs. Use GPU for fast previews and quick iterations. Use CPU for more stable, complex final renders. In short: GPU for speed, CPU for heavy scenes.
Optimize your settings to reduce the number of samples needed. Use the denoiser, remove unnecessary geometry and materials, and lower resolution when possible. You can also increase the noise threshold and rely on a denoiser to maintain quality. Or, just use a lightweight V-Ray alternative that runs in the cloud and sidesteps all the complexity.

.webp)