Getting your Enscape render settings right can mean the difference between a flat, washed-out image and a presentation-ready visual that wins clients.
Yet, most users hit "Start Enscape" expecting magic, only to find overexposed exteriors, dark interiors, and materials that look more like plastic than wood.
If that sounds familiar, you're in the right place. This guide walks you through the specific Enscape settings you need to learn to achieve photorealistic renders.
Let’s dive right in.
Unlike V-Ray, Enscape is designed to get you decent results fast. It’s one of the easiest physically-based renderers out there.
But "decent" isn't what you're after when presenting to a client or submitting for a competition.
The default auto settings create several common problems:
The truth is, auto mode prioritizes speed and compatibility over quality. Enscape's auto exposure, for example, adjusts brightness dynamically as you move the camera. Which sounds helpful until you realize it means every view looks slightly different, even within the same project.
If you want your Enscape renders to look photorealistic, you need to take control.
The good news is that once you figure out which rendering settings in Enscape are best for your workflow, you can save them as presets and apply them instantly to future projects. We’ll get to that in a bit.
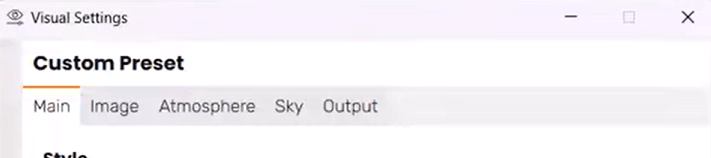
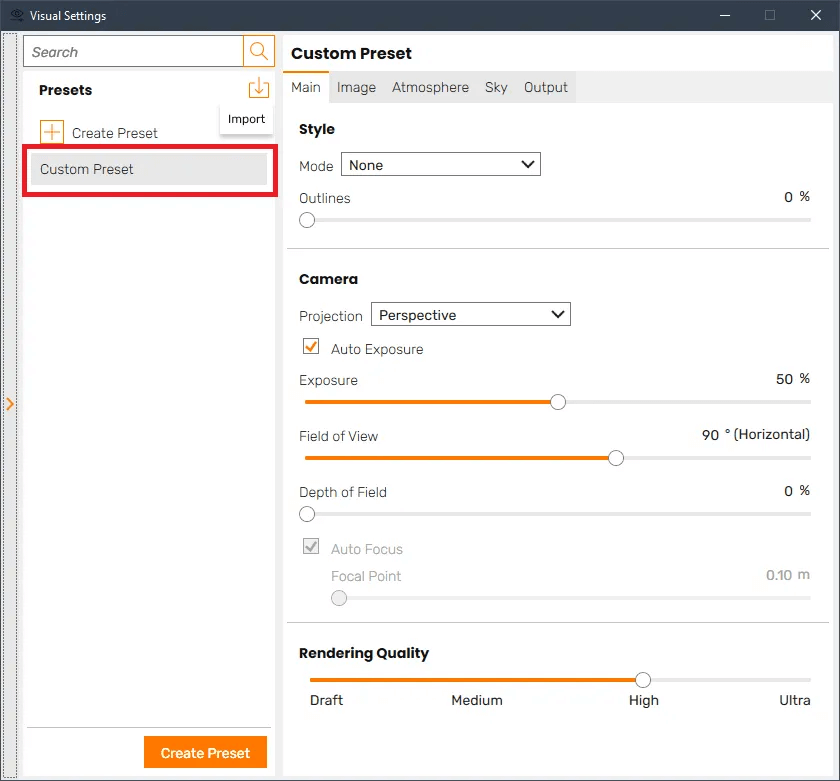
Everything starts in the Visual Settings window. Think of this as your primary control panel.
Open Enscape, then click the Visual Settings button in the viewport toolbar. This window is organized into tabs: Main, Image, Atmosphere, Sky, and Output.
The Main tab is where you'll spend most of your time when learning how to make a realistic render in Enscape. It contains controls for rendering style, exposure, field of view, depth of field, and the all-important rendering quality slider.
At the bottom of the Main tab, you'll find the Rendering Quality slider. This single control determines how much computational effort Enscape puts into lighting calculations.
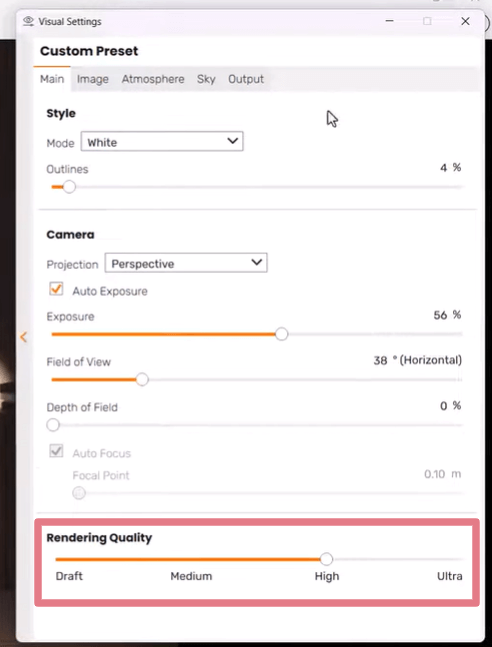
Draft mode: Only direct light illuminates your scene. Use this only for quick navigation or when working on underpowered hardware, as results typically look flat and unrealistic.
Medium: Enscape begins its path tracing calculations here. Light bounces off surfaces once, taking color and intensity information from the first surface it hits and carrying that to illuminate secondary surfaces. In return, reflections start showing actual geometry instead of rough estimates.
High: Lighting is calculated with more precision, and reflections hide fewer objects. Colored glass affects reflections, indirect lighting, and fog. This is generally recommended for real-time navigation while preserving GPU resources.
Ultra: Two bounces of light rays instead of one, resulting in even more natural-looking ambient lighting. The difference from High isn't dramatic, but for final renders (especially interiors with complex lighting), it's worth the extra processing time.
Important note: better output quality comes at the cost of higher resource usage, so make sure that your workstation can keep up.
Lighting is where realistic rendering in Enscape either succeeds or fails. You have two categories to master: natural light (sun and sky) and artificial light (fixtures and lamps).
You can adjust the sun's position in several ways:
Pro tip: Don't trust the default sun intensity for every scene. Overall exposure may also depend on materials, auto-exposure, HDRI sky, and ambient brightness.
Exteriors shot at midday often wash out, while morning or late afternoon positions create more interesting shadows and warmer tones. For architectural photography-style renders, the golden hour lighting (shortly after sunrise or before sunset) often produces the most flattering results.
In the Atmosphere tab, you'll find the Sun Brightness slider. For most exterior scenes, keeping this at 100% works fine. But for interiors where you want sunlight streaming through windows without blowing out highlights, try reducing it to 60-80%.

Here's something that trips up almost everyone: Enscape's lights are always on, but during the day, they appear off because sunlight crushes their output. This is due to auto exposure compensating for bright exterior conditions.
To make interior lights visible during the day, use the Artificial Light Brightness slider. Cranking this up makes your fixtures pop, even in sunlight.
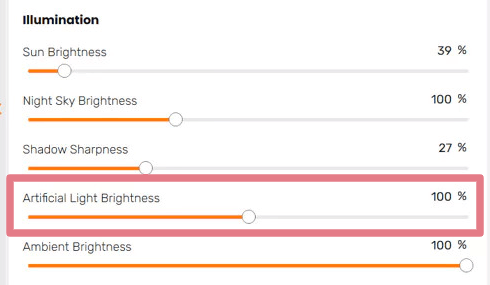
Pro tip: To achieve higher realism in interior scenes, set artificial light brightness between 100-125%. For exterior night scenes, keep it lower (around 75-100%), so lights don't blow out or create unrealistic hot spots.
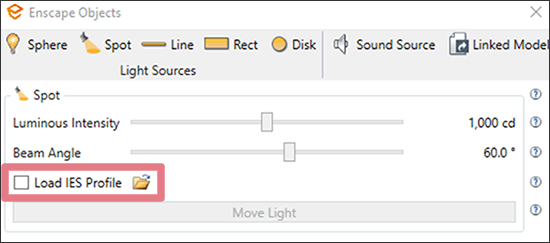
Want to take your Enscape lighting settings to the next level? Use IES profiles.
IES (Illuminating Engineering Society) files contain real-world photometric data from actual light fixtures. Instead of generic light cones, you get the exact light distribution patterns that manufacturers design into their products.
You can download IES files directly from many lighting manufacturers' websites (like Philips, Lutron, or WAC) or from free libraries like the IES Library. To apply one in Enscape, select your compatible light object and click "Load IES profile" in the Enscape Objects window.
Enscape provides five light types, each suited for different situations:

A perfectly lit scene still falls apart when surfaces look flat or plasticky. Here are the crucial material settings in Enscape you need to understand.
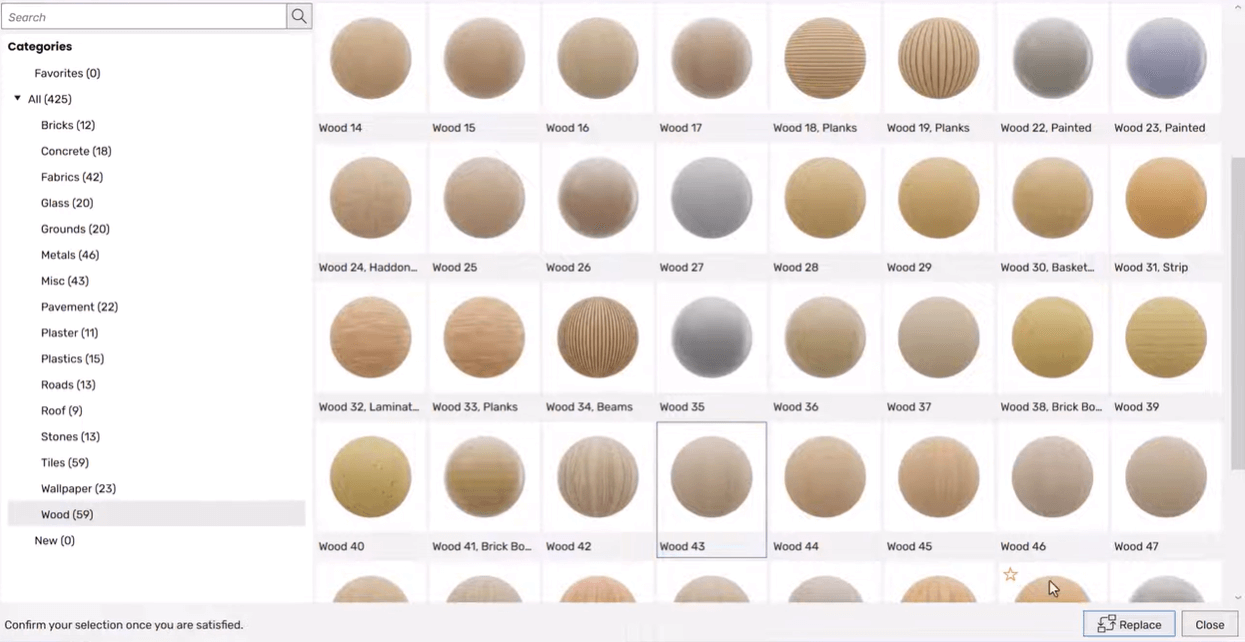
Enscape includes a library of over 425 predefined PBR (Physically Based Rendering) materials, each with appropriate values based on real-world products.
This is the fastest way to get realistic results without manual configuration. Access it through the Enscape Material Library panel and drag materials directly onto objects in your model.
You can also import PBR materials from external sources like Poly Haven, ambientCG, or ShareTextures. Just make sure to download the full texture set. Apply each map to its corresponding slot in the Enscape Material Editor.
The Height section in the Material Editor lets you add surface detail without modeling geometry. You have three options:
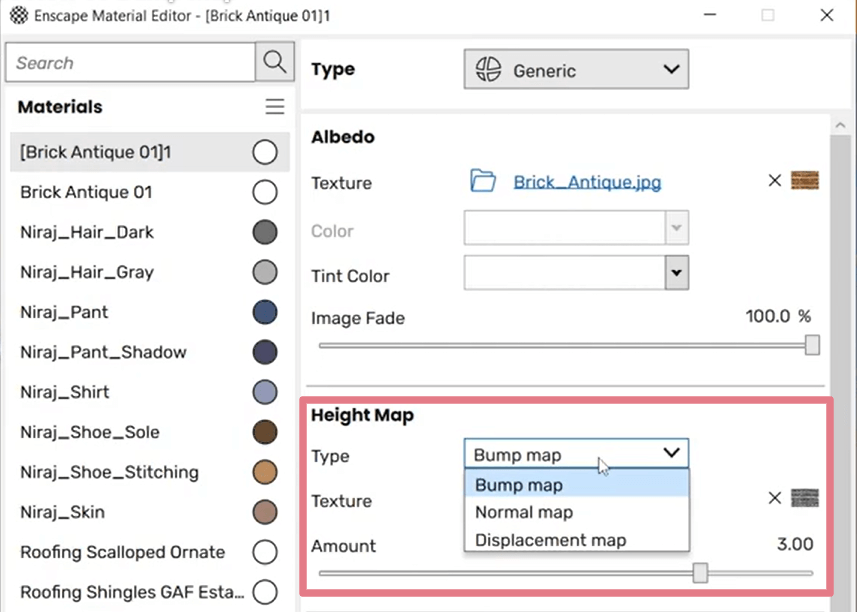
Enscape’s documentation doesn't understate this: height maps are incredibly valuable for realism. Take a flat wood floor that looks like a printed decal; add a bump or displacement map, and suddenly you can see the grain catching light at different angles. This setting works for concrete noise, tile grout lines, fabric weaves, and even full reliefs.
Under the Reflections section, the Roughness slider controls how smooth or rough a material appears. Low roughness (toward 0%) creates mirror-like reflections. High roughness (toward 100%) diffuses reflections into a soft, matte finish.
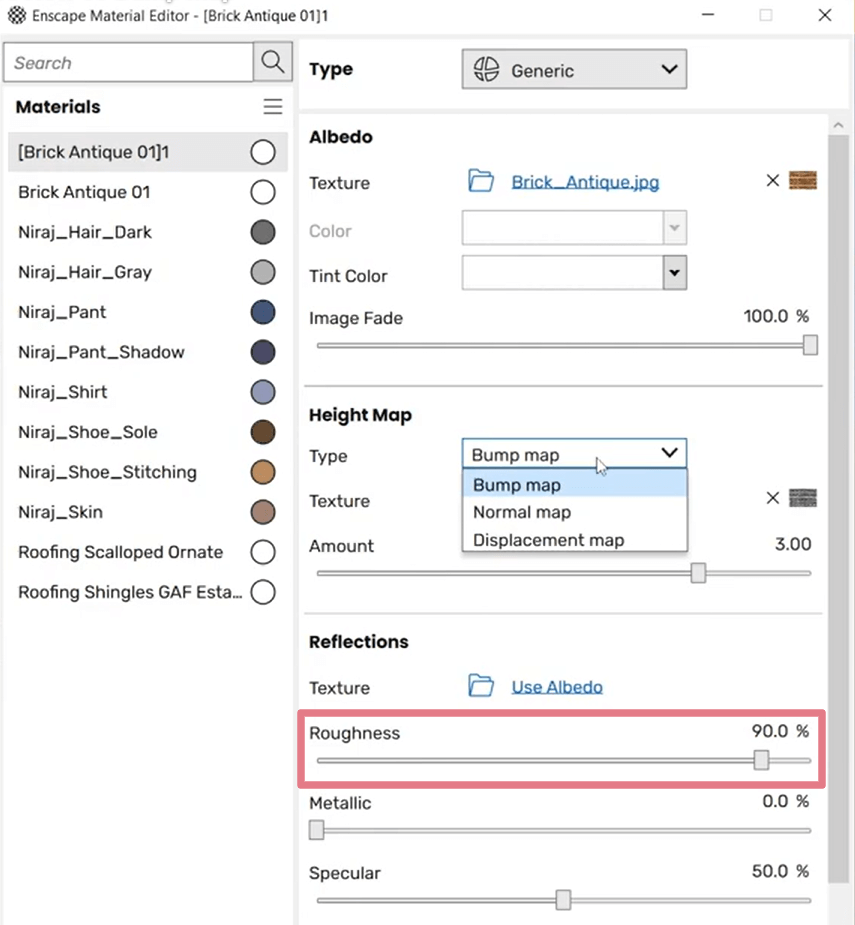
For the highest realism, avoid the extremes. Real-world materials rarely have perfect smoothness.
A polished concrete floor might be 15-25% roughness. Matte paint approaches 80-90%. Materials set to exactly 0% or 100% roughness, on the other hand, look artificial because they have no variation that breaks up reflections.
Enscape’s Atmosphere tab controls environmental effects that dramatically impact the final image’s overall feel.
Subtle atmospheric fog adds distance and depth to exterior renders, making far-away objects slightly hazy, just like in real photography. This effect, called atmospheric perspective, is one of the rendering settings in that help viewers perceive depth in images.
You can adjust its intensity and distance using these two sliders:

On High and Ultra rendering quality, fog looks more realistic when lit through complex geometry like vegetation or perforated screens.
The Sky tab lets you choose between Enscape's procedural sky and custom Skybox (HDRI) images.
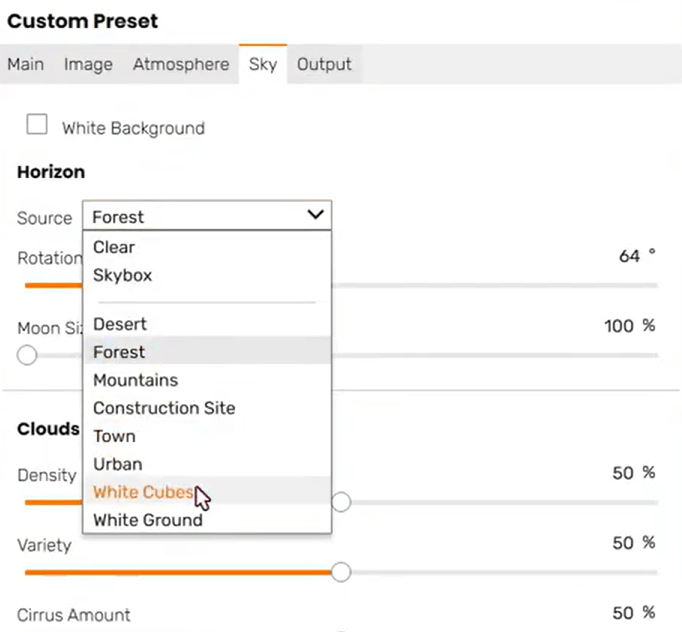
Procedural sky works well for general exterior shots. Adjust cloud density and variety to control how much direct sunlight gets through. You can also adjust cloud height and movement speed for animated scenes.
For more dramatic or controlled results, upload a custom HDRI. You can get them for free the asset libraries mentioned before. For interior renders, consider using a neutral gradient HDRI that simulates studio lighting conditions by letting artificial lights take the lead.
To master setting the environment in your scenes (and not only), check these Enscape courses.
The Image tab in the Visual Settings contains render post-processing effects that polish your final Enscape image. Think of these as the equivalent of Lightroom adjustments for photographers.
Consider turning off Auto Exposure. Seriously.

Auto exposure constantly adjusts brightness based on what's in frame, causing inconsistent results between views. Disable it, then manually set exposure using the Exposure Brightness slider.
If a scene looks too dark, increase exposure, and vice versa. Once you find settings that work for your project, they'll work consistently for every camera angle, which is essential when you're batch rendering multiple views.
Enable Auto Contrast to let Enscape automatically optimize highlight and shadow balance. If you want manual control, disable it and adjust the Highlights and Shadows sliders individually.
The Color Temperature slider shifts your entire scene warmer (lower values, more orange) or cooler (higher values, more blue). For instance, daylight sits around 4500-5500K, while warmer interior lighting reaches 3000-3500K. Use those references to match the mood you're going for.
Saturation controls color intensity. Subtle increases (10-20%) can make renders more vibrant, but overdoing it creates an unnatural, over-processed look.
Depth of field blurs objects outside your focal distance, mimicking the effect of a camera lens. It's powerful for making your renders look more photographic, especially for close-up interior shots or architectural detail views.
Enable DOF, click in the Enscape window to set your focal point, and adjust the aperture. Wider apertures (lower f-stop values) create more blur; narrower apertures keep more of the scene in focus.

For architectural visualization, use DOF sparingly. You don’t want heavy blur to make images look like miniature models.
A few other Image tab controls worth knowing:
Without proper setup, rooms look either cave-dark or artificially bright. Here's how to make your Enscape interior renders look more realistic.
Daytime interiors need both sunlight through windows and visible artificial fixtures. This requires careful balancing:
Lighting values vary by project scale, material reflectivity, window size, and HDRI/sky settings, so treat these percentages as starting points rather than universal presets. Start with these values and tweak based on your specific scene.
The Ambient Brightness slider in the Atmosphere tab can save some dark interiors. Unlike adding more light sources, ambient brightness lifts shadow areas while keeping brighter regions relatively unchanged. It's like filling light in photography.
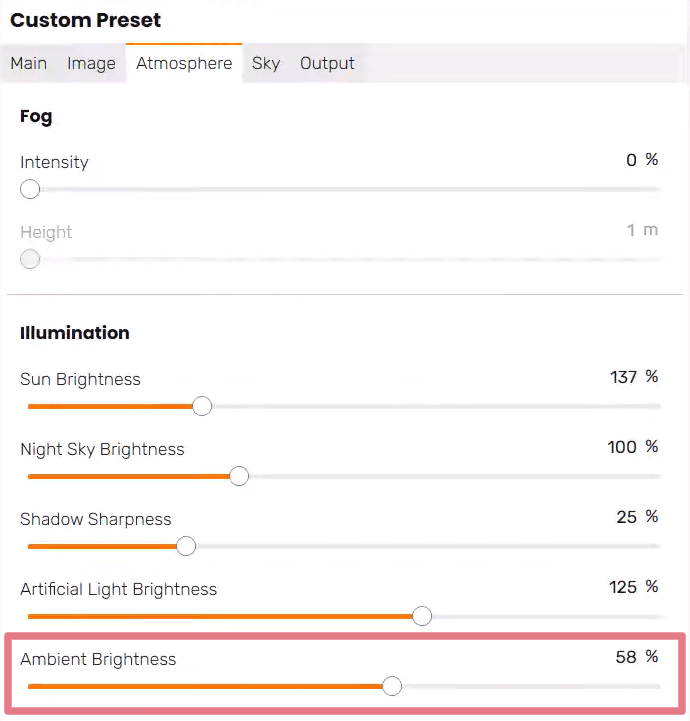
This is yet another setting in Enscape to use with caution. Too much ambient brightness flattens your scene by eliminating shadow contrast. But for interiors where corners and under-furniture areas go pure black, bumping ambient brightness to 20-40% can make a significant difference.
Empty rooms always look fake. Enscape's Asset Library includes thousands of high-quality furniture pieces along with plants, people, and decorative objects. Adding these elements creates visual interest, catches light in interesting ways, and makes spaces feel inhabited.
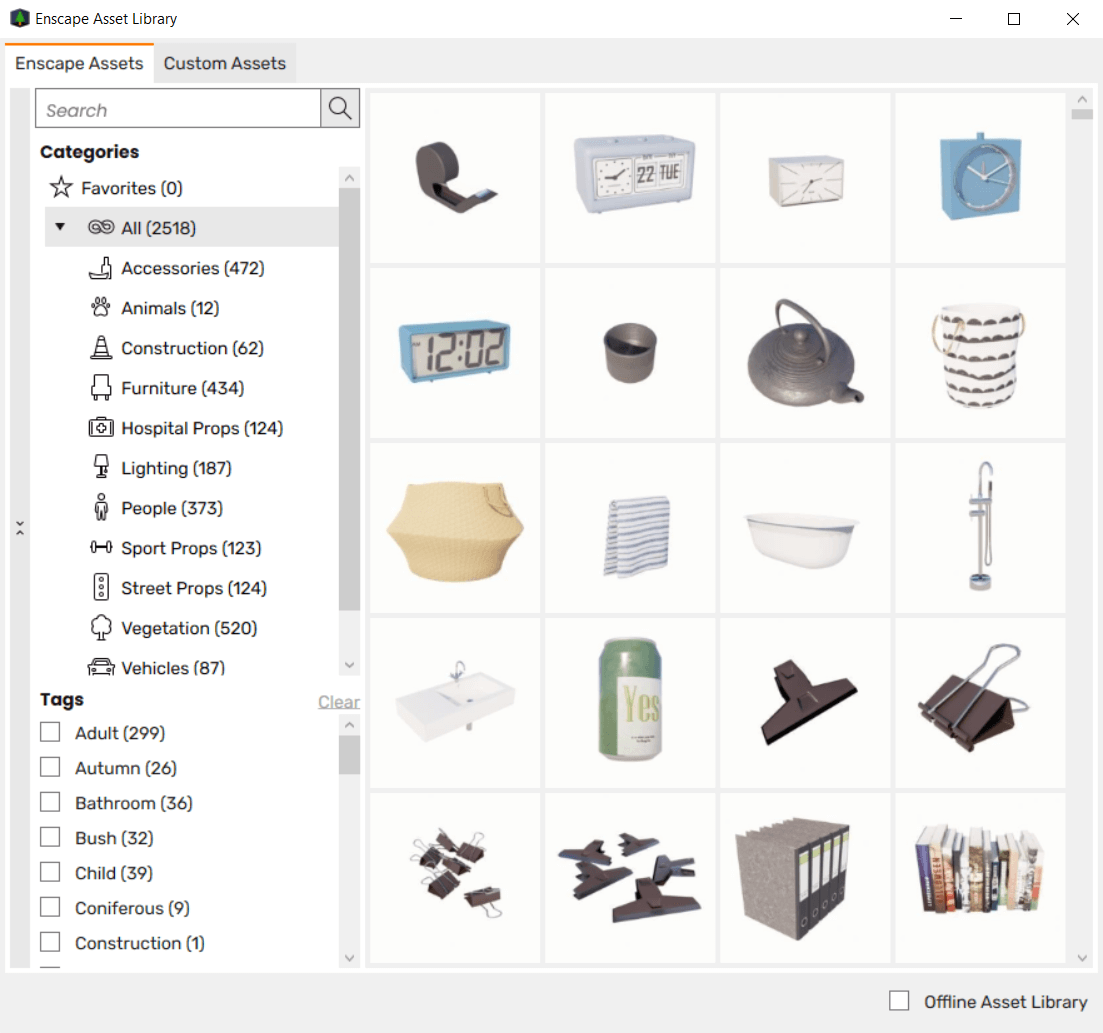
People assets are especially important. They provide scale reference and bring life to otherwise static scenes.
Once you've dialed in the render settings that work, save them. They will spare you from having to start every project from scratch.
In the Visual Settings window, expand the Presets panel on the left side. Click the + icon to create a new preset from your current settings. Name it something descriptive.
Consider creating separate presets for:
You can link presets to specific views, so when you batch render multiple images, each view automatically uses its assigned preset. This maintains consistency across your project deliverables and saves significant time compared to manually adjusting settings for each scene.
To link a preset to a view, select the view in Enscape's View Management panel, then choose the preset you want associated with it.
Even with the most optimized settings, rendering in Enscape has its limits. You're still waiting for exports, tweaking dozens of sliders, and dealing with hardware constraints if your model gets complex.
That's where AI rendering changes the game.
Modern renderers like MyArchitectAI let you enhance your Enscape outputs instantly. Upload your render, and AI handles the photorealistic polish, from refined materials to atmospheric effects, within seconds. No high-end hardware required since it runs entirely in your browser.
This is especially useful when you need quick iterations during client meetings or want to explore multiple lighting scenarios without re-rendering each time. Use Enscape for design development and real-time walkthroughs, then let AI handle the final presentation polish.
It's the best of both worlds: real-time flexibility from Enscape, photorealistic quality from AI, and zero hardware headaches either way.
You can enhance 10 Enscape renders for free.

.webp)