
Knowing how to render in SketchUp gives you a real edge.
The difference between a plain SketchUp model and a photorealistic rendering can be the difference between a 'maybe' and a 'yes' from your client.
Realistic visuals help clients better understand your vision early in the process, make communication much smoother, and help avoid costly mistakes later on.
But visualizing architectural and interior designs has always been a complex and resource-intensive process, that needed extensive modeling, lighting, and texturing work. This, combined with the need for expensive hardware and long rendering times was a barrier to entry for many SketchUp users.
Not anymore.
With modern SketchUp renderers, anyone can visualize their SketchUp models quickly and easily, without sacrificing quality.
In this guide, we'll give you step-by-step instructions on how to render in SketchUp and achieve realistic results without spending weeks learning new software or having to shell out thousands on GPUs.
Let's make one thing clear - SketchUp doesn't offer any native rendering tools.
To visualize your models, you'll need a plugin or external rendering software. These will either let you adjust lighting, materials, and textures manually or handle it automatically for you, based on the method you pick.
Here's how they compare:
Below, you'll learn how to render your SketchUp models using each of these methods.
We've covered some of the best SketchUp rendering programs in another article, so if you haven't picked your tool yet, we recommend checking that list first.
Now, let's start with the quickest and easiest method for client-ready images: AI rendering.
Tools using artificial intelligence-based rendering engines are the most efficient way of turning your SketchUp designs into photorealistic visuals.
Not only do they produce quality renders within seconds but also don't require powerful hardware and installations as the process runs in your browser.
This SketchUp rendering software is praised by architects and interior designers for its impressive accuracy and ease of use.
Here's how to use it.
1. Sign up for a free account.
2. Upload an export of your SketchUp scene.
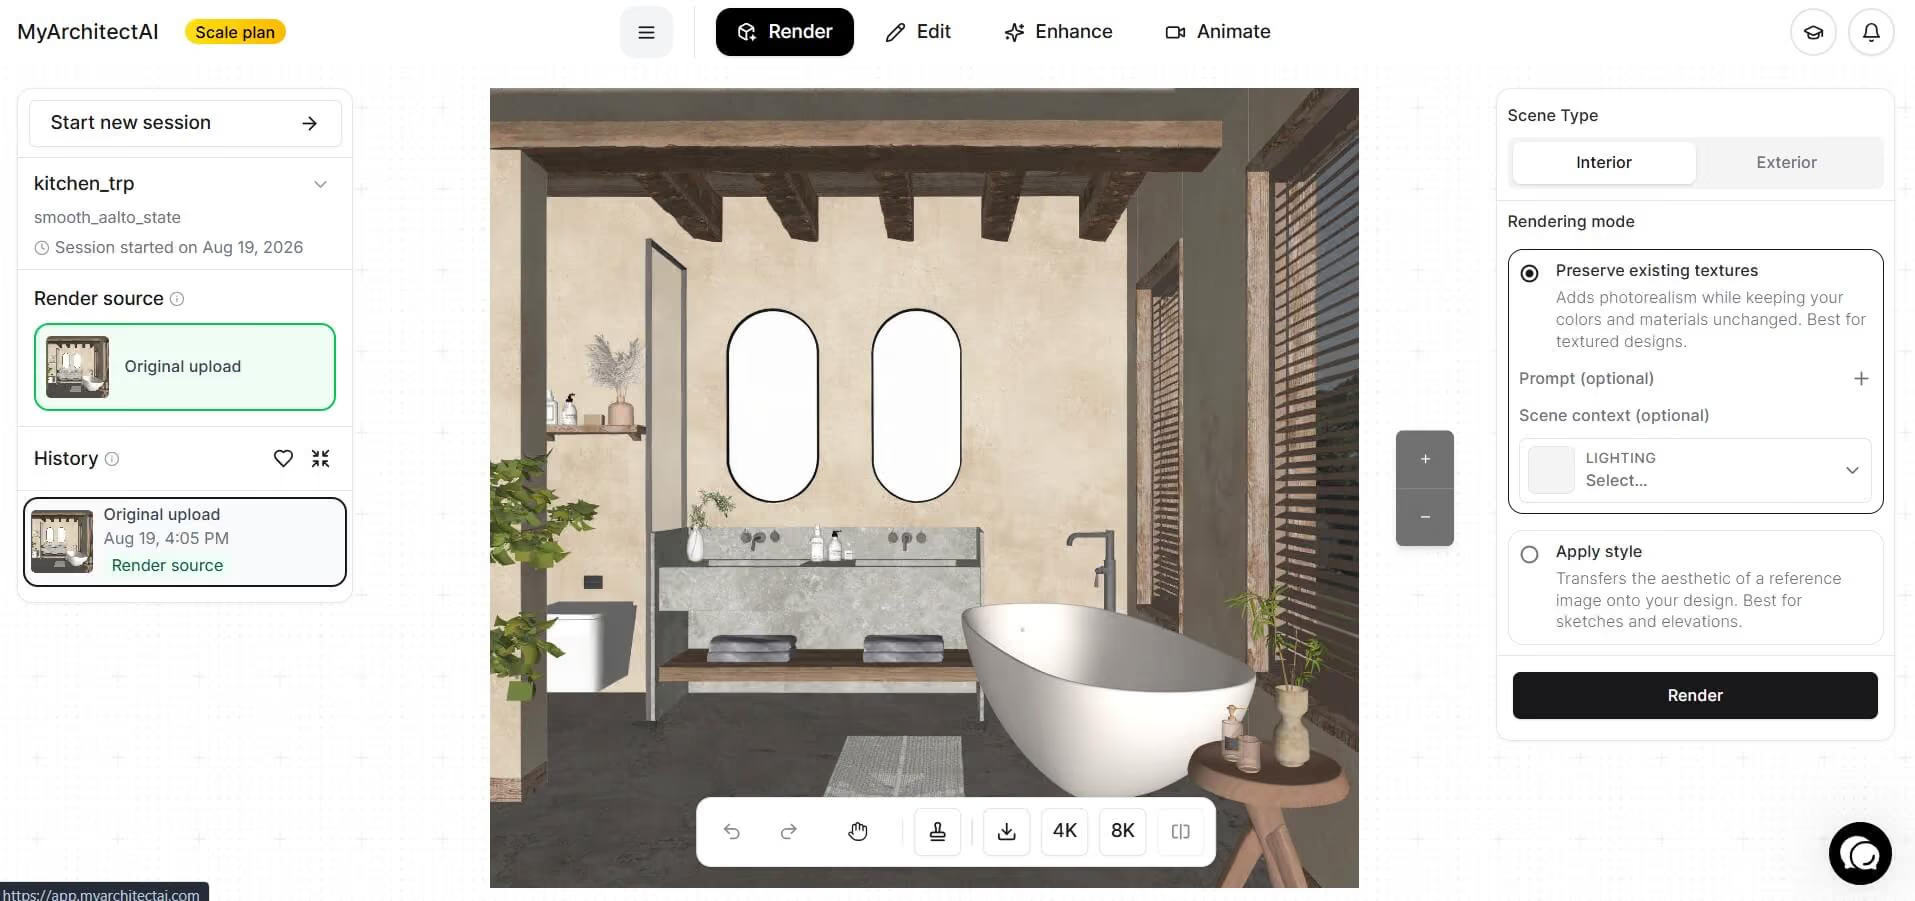
3. Select the lighting for your scene using presets.
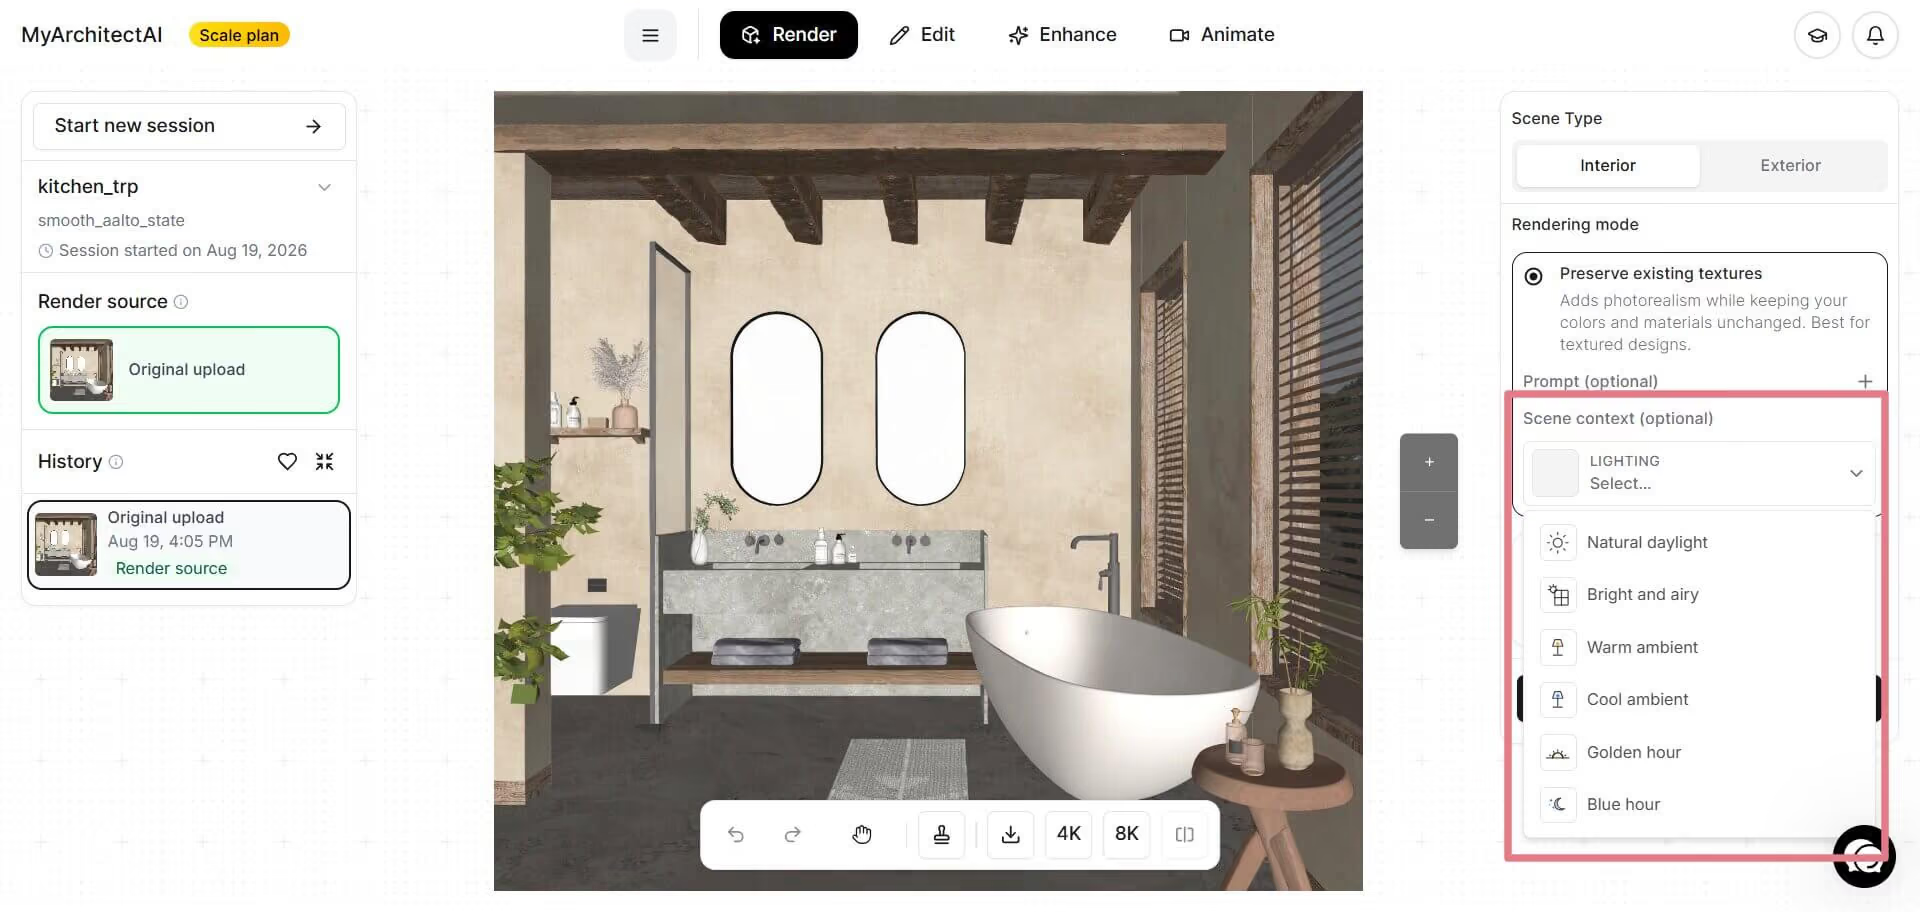
Optionally, you can also generate a prompt describing your scene, to give the engine more context, but in most cases, MyArchitectAI doesn't need it.
4. Click the "Render" button to visualize your SketchUp scene. The image will be ready in 10-15 seconds.
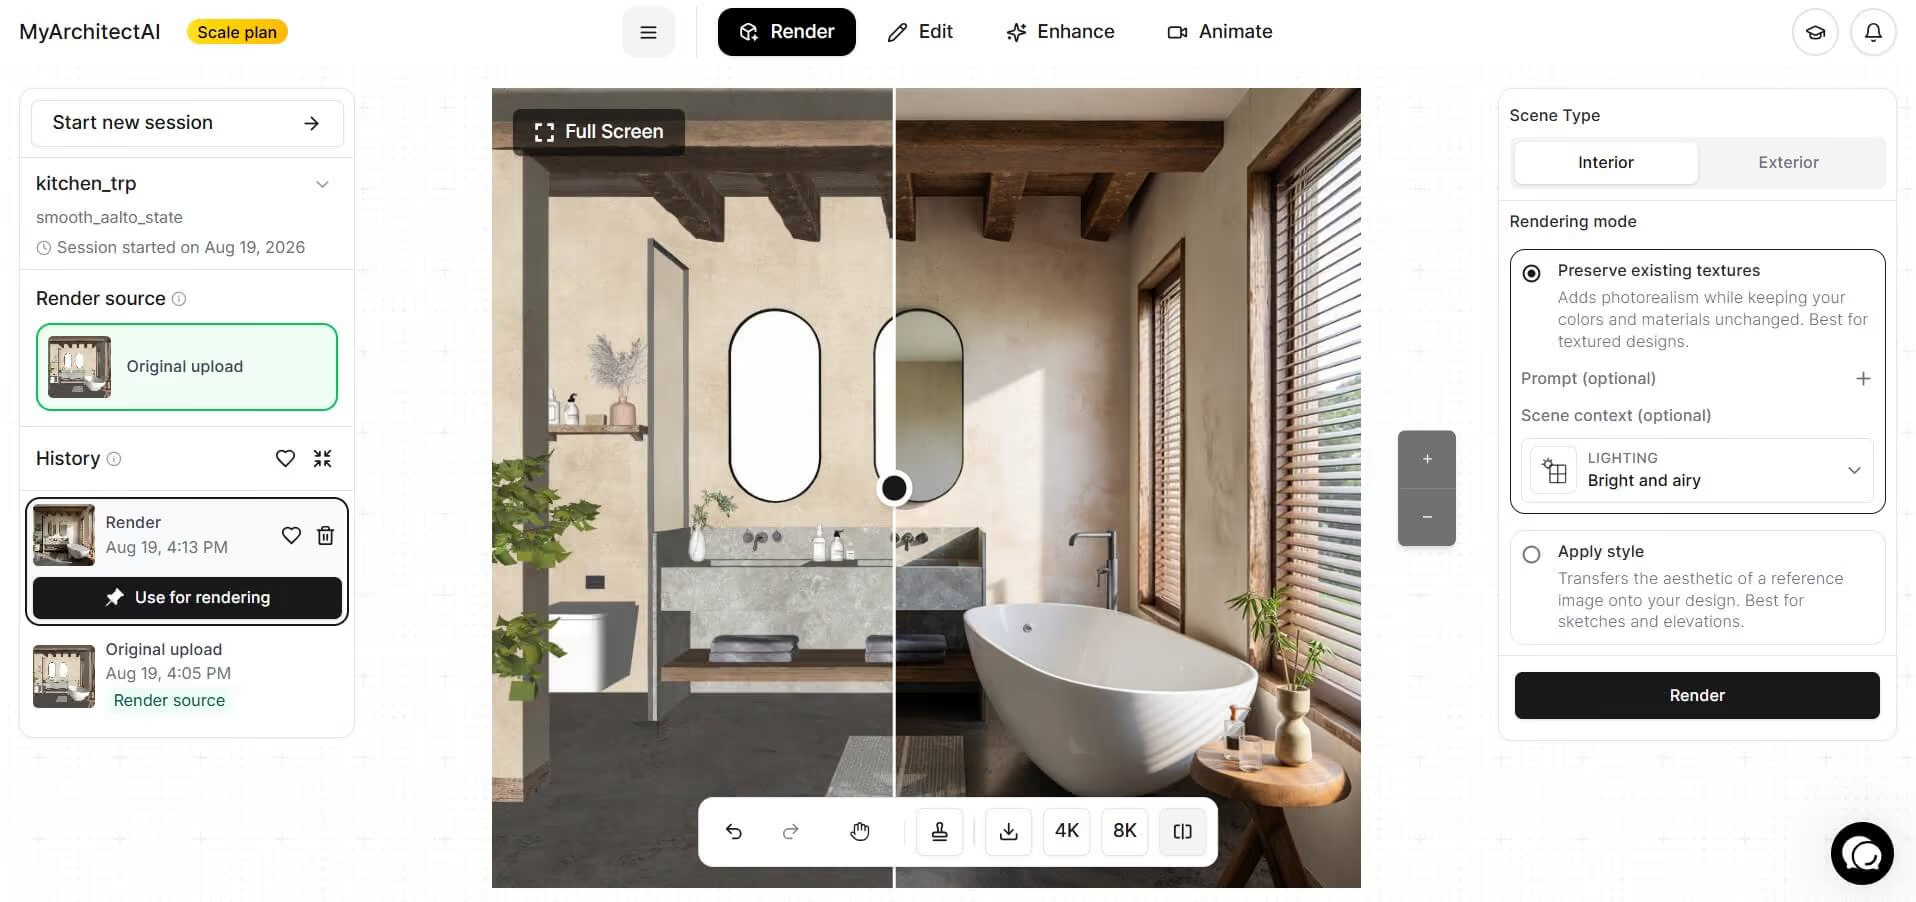
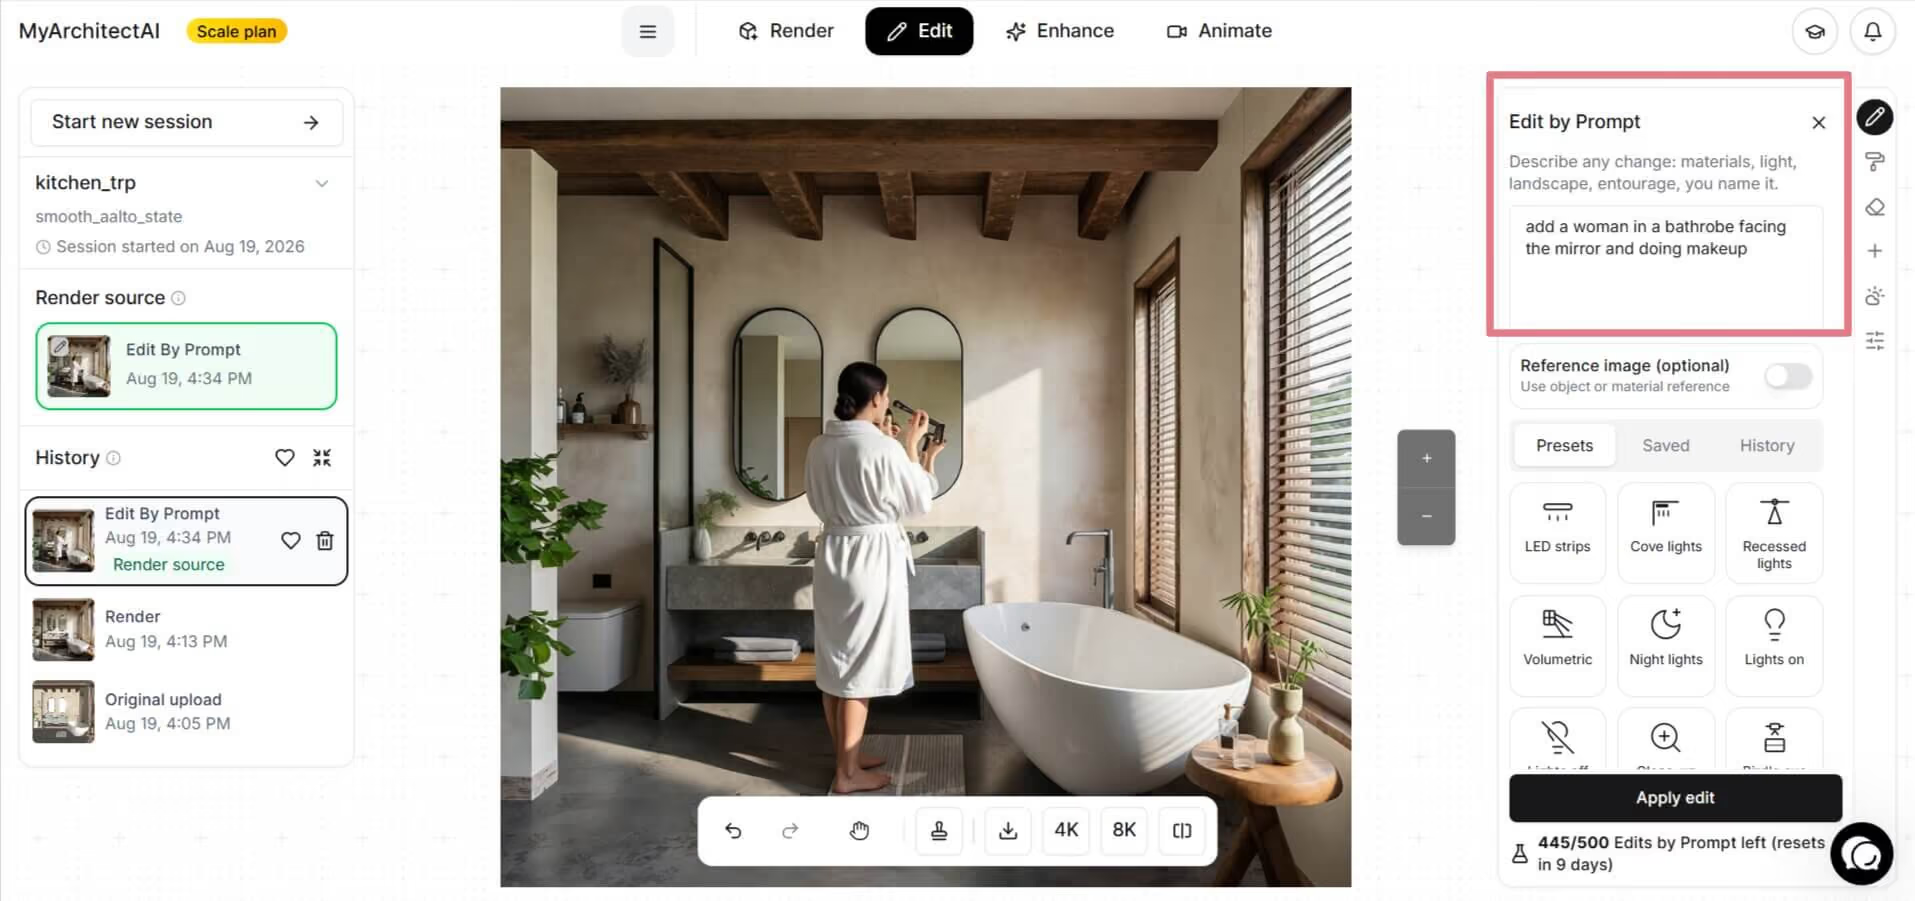
You can download your render in up to 8K resolution, or move to the Edit tab to make changes like applying different textures, adding or removing obejcts, or viewing your scene in different moods.
For example, let's add a woman in front of the mirror using the Edit by Prompt tool:
MyArchitectAI works on all devices (desktops, tablets, and mobile phones) and operating systems (Windows, Mac, Android, and iOS). No installs are needed.
Give it a try here.
If you haven't heard yet, SketchUp has its own AI renderer, called SketchUp Diffusion.
While it doesn't preserve the geometry and textures as precisely as MyArchitectAI, it can still be useful for accelerating your ideation process and creating realistic visuals of architectural and interior designs.
Here's how you can use it to quickly render your SketchUp models for free.
1. Install SketchUp Diffusion from the Extension Warehouse.
2. Open your SketchUp model and enable the tool from the "Extensions" menu.

3. Enter your text prompt describing the scene. Here are SketchUp's tips on creating effective prompts.
.png)
4. Select a style preset to guide the AI in generating your desired aesthetic.

5. Adjust the "Respect Model Geometry" and "Prompt Influence" sliders:

6. Click the "Generate" button. Your SketchUp model will be turned into a realistic render in under 20 seconds.
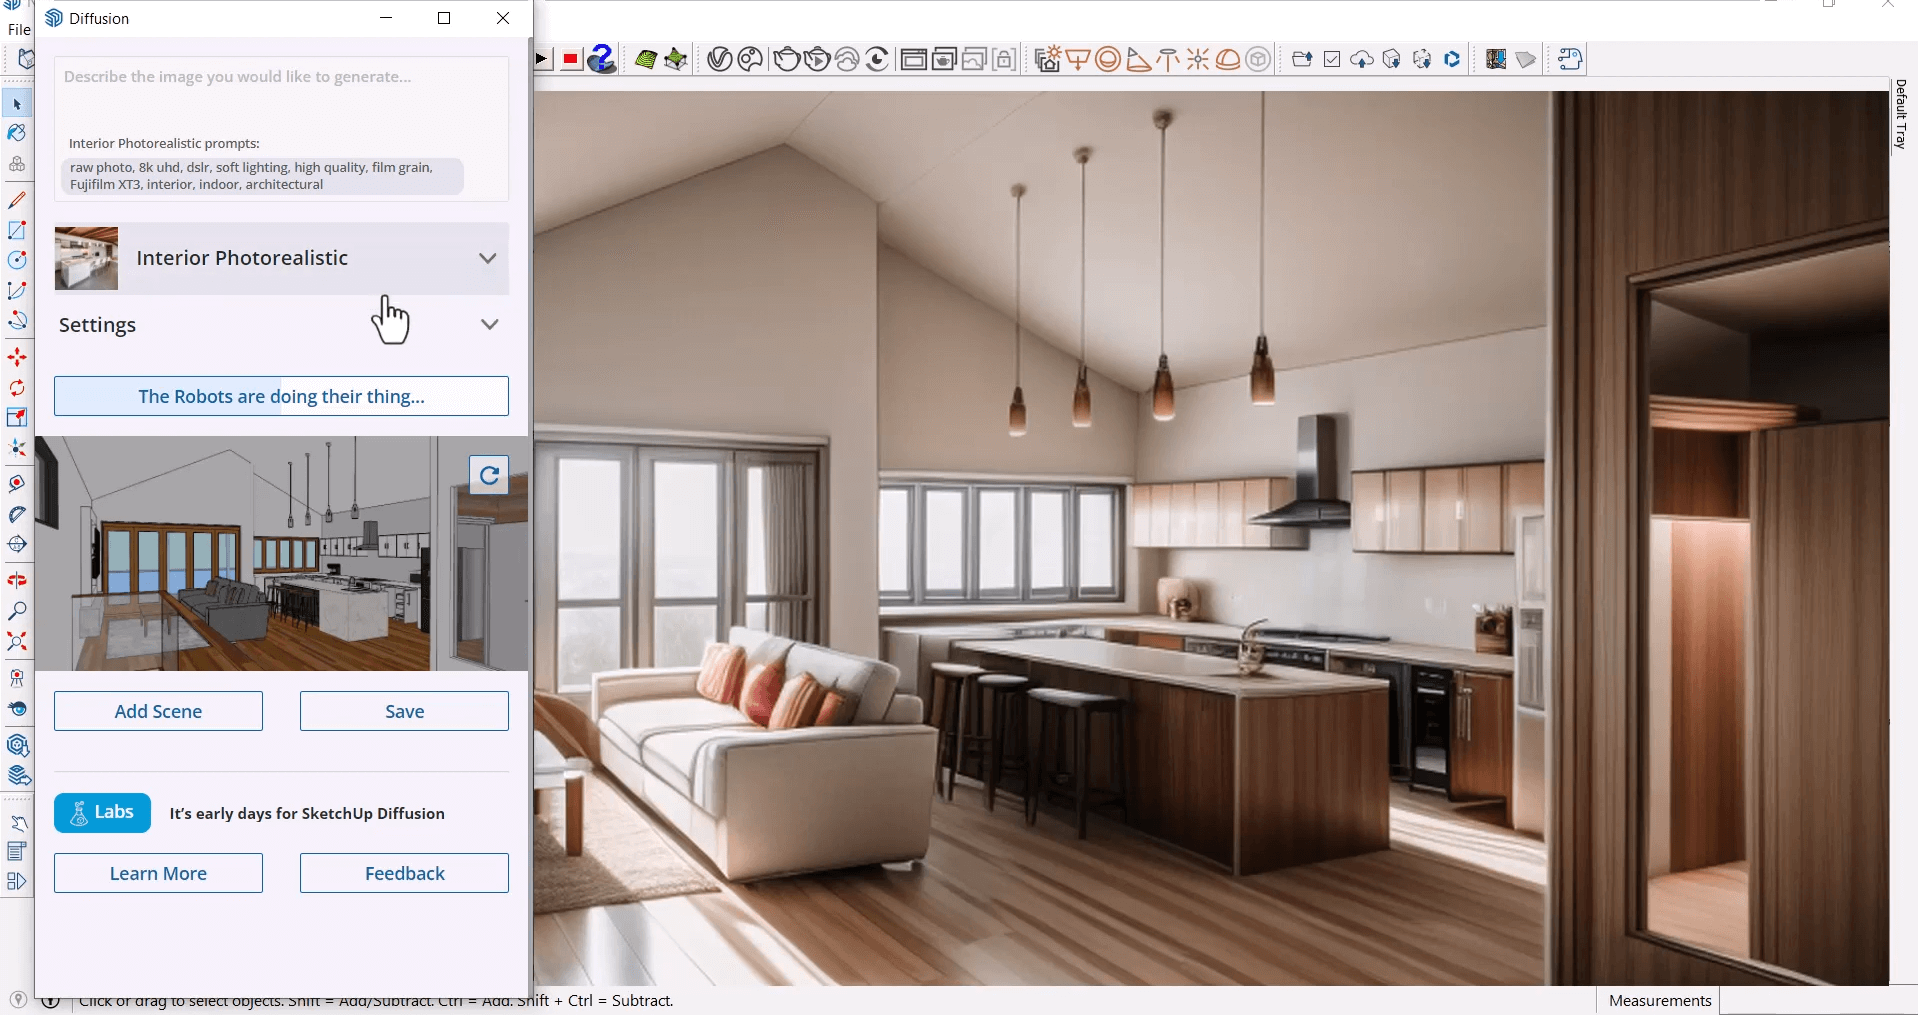
SketchUp Diffusion is included in Go, Pro, and Studio subscriptions, and while still in the beta stage, it's free to use.
There are plenty of traditional (non-AI) SketchUp rendering tools and plugins that let you achieve stunning visuals.
Compared to AI renderers though, they require a much steeper learning curve, powerful GPUs, and a lot of manual work on lighting and texturing your design to achieve a similar level of photorealism.
However, if you invest enough time to master them, you can get the highest levels of realism and accuracy needed for big clients and competitions. Use our SketchUp courses list to save same time on research.
In this guide, we'll use V-Ray as an example, as it's one of the best rendering software tools for SketchUp on the market, used by 92 of the top 100 architecture firms.
Here's how to use V-Ray to render your SketchUp models.
1. First, subscribe for a free trial or a paid subscription and install the software.
2. Next, open and organize your model. Prepare the scene you want to render by assigning tags and creating components and groups correctly. This will help avoid confusion as the project becomes more complex with time.

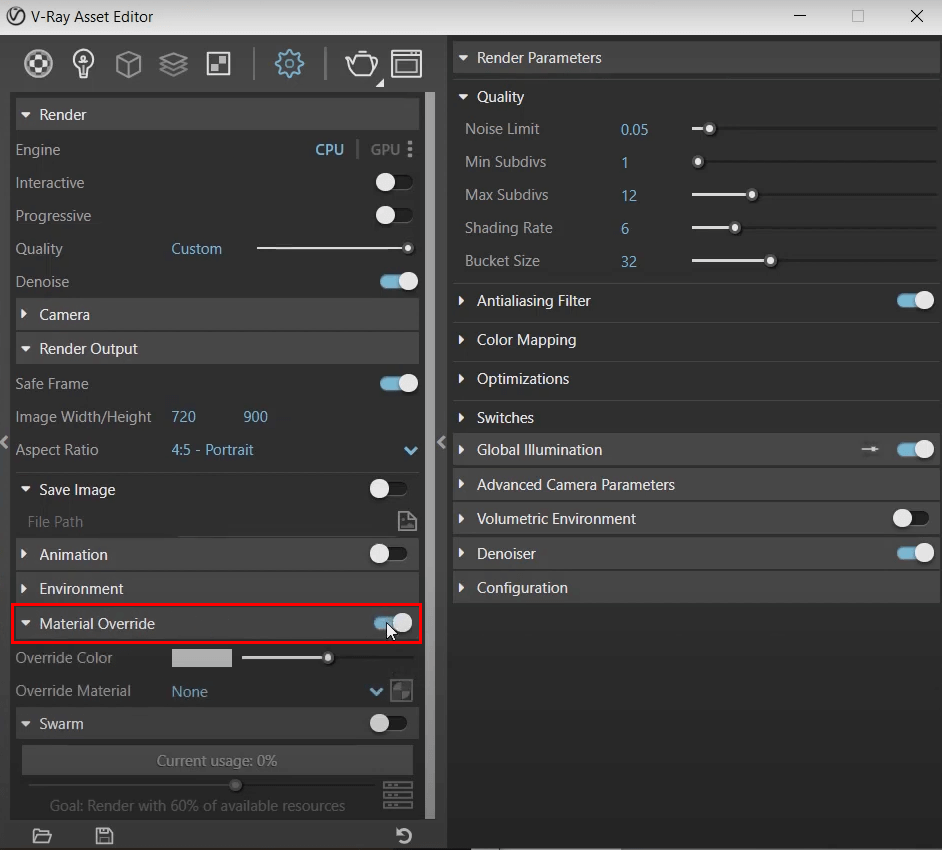
3. Adjust the camera settings:
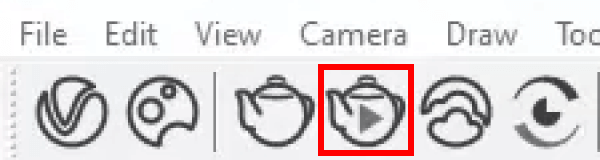
4. Next, click the teapot icon with a play button to start the interactive render.
5. Use the "Proportion Guides" layer in the right-hand menu to refine your composition. We recommend using the rule of thirds option which is a common approach in photography. Then, update the scene camera when you're done with framing.

6. Let's now set the lighting. While V-Ray for SketchUp uses a daylight system by default, you can adjust the settings to match your vision. Enable the "Custom Orientation" toggle in the "SunLight" menu and experiment with the settings until you reach your desired result.

7. Next up, materials. Open the Chaos Cosmos Browser:

...and download some materials you'd like to use. You can either do it one by one or download a variety of different materials in bulk, in a single click, by going to Collections → V-Ray Material Library → Download All.
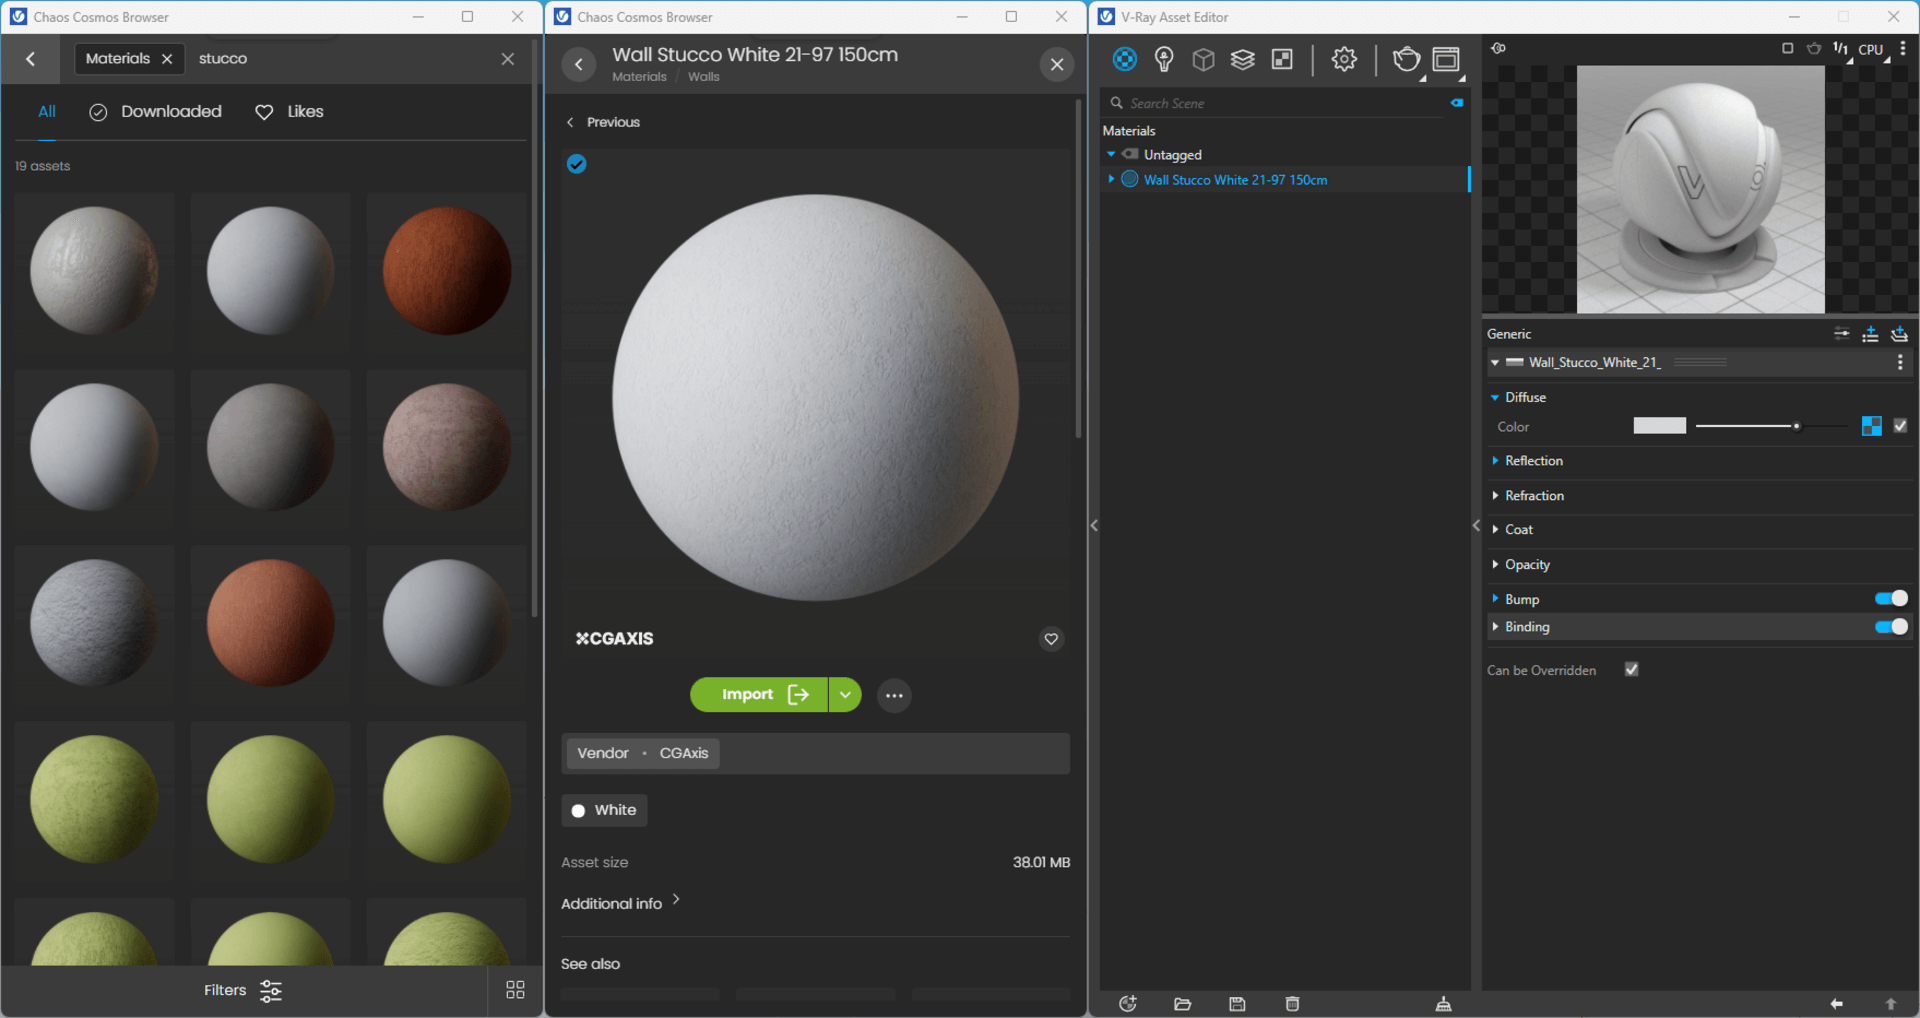
8. To use a material, right-click on its name and apply it to a selected object, layer, or even a multi-selection of components and groups in the viewport.

9. Make sure to set the "Exposure Value (EV)" to "Auto" so that your render's exposure doesn't change while applying materials.

10. Next, let's add some entourage. Open the Chaos Cosmos Browser and import your desired objects (vegetation, furniture, humans) to the scene.

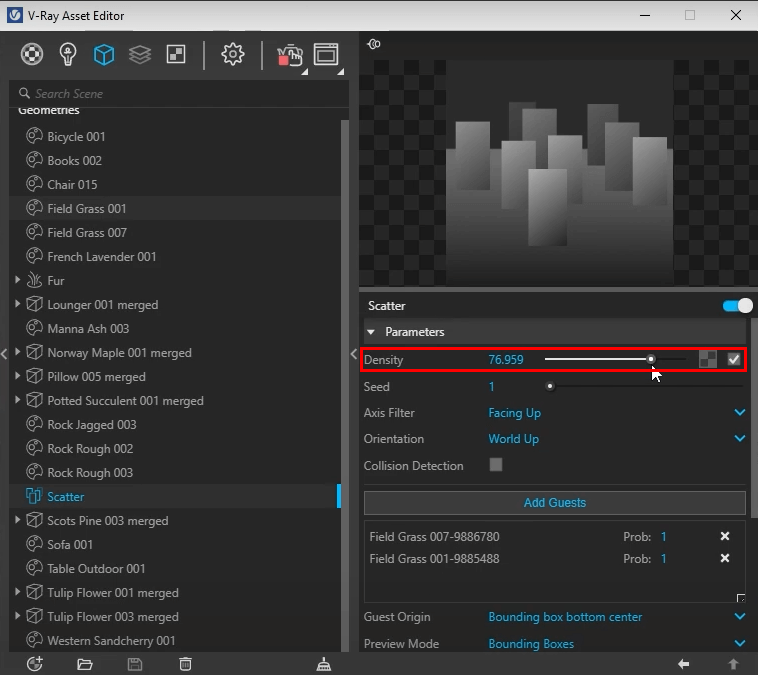
11. For objects you'd like to spread across a given surface (e.g. plants on a grass), you can use the Scatter tool to save you some manual work.

Use the "Density" slider to introduce higher diversity for a more natural look.
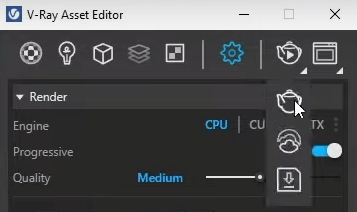
12. And lastly, rendering your SketchUp scene. Begin by selecting the rendering engine V-Ray will use to visualize your design. Choose between CPU, CUDA, or RTX based on your computer's capabilities (you can benchmark your hardware using V-Ray's free tool). Set the image quality based on your needs keeping in mind that the higher the quality, the longer the rendering will take.

13. Then, click the teapot icon (without a play button) to start a production render.
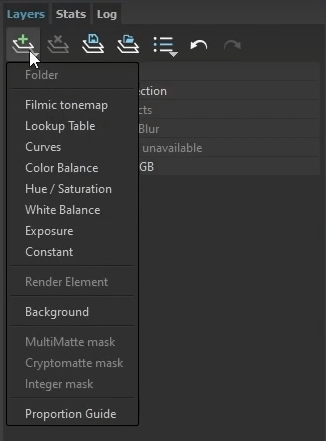
14. After the process is complete, your render might contain some noise. To smooth it out, enable the "Denoiser" feature. Don't worry; denoising doesn't require re-rendering the scene.

15. Finally, add some final touches to your SketchUp render such as exposure, color correction, and reflections for more realism.
Getting a SketchUp render out of the door is one thing. Getting it to look convincingly real is another. Here's what actually moves the needle.
Nothing separates a flat-looking image from a photorealistic one faster than lighting. SketchUp's default sun gives you a starting point, but it rarely produces the soft, nuanced shadows you see in professional archviz work.
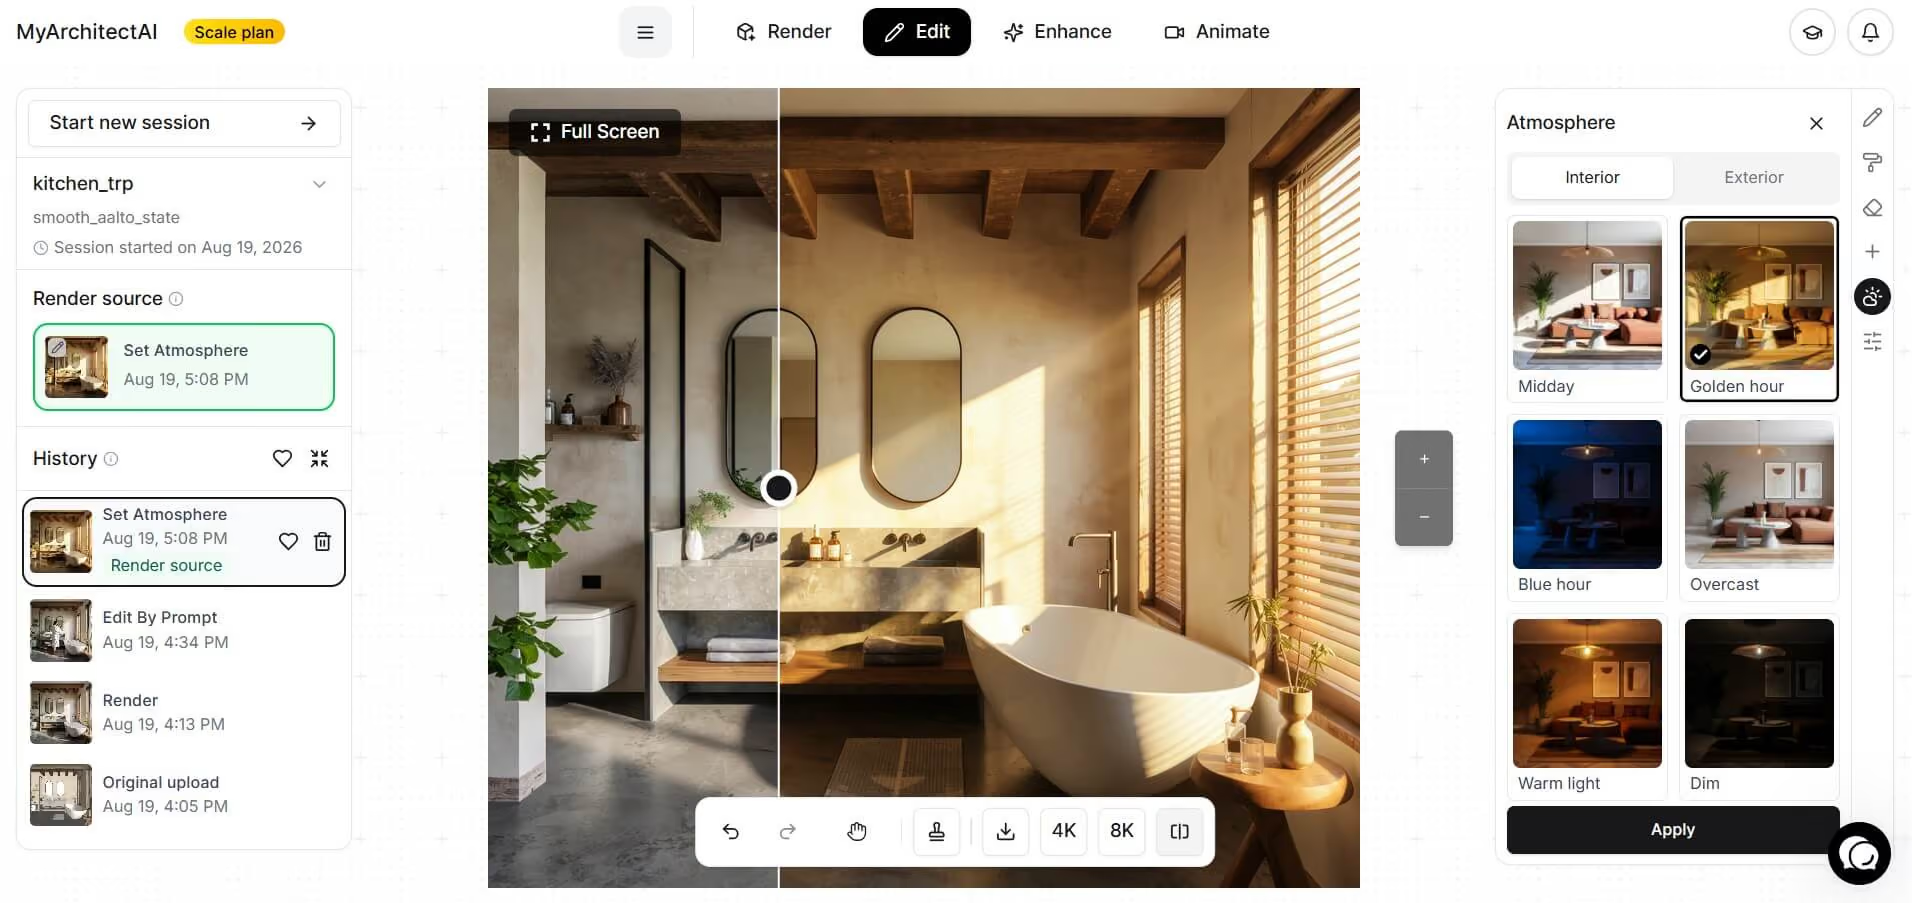
For exterior renders, pay attention to the time of day and geographic location you set in SketchUp's shadow settings. Early morning and late afternoon light (often called golden hour) tends to look far more cinematic than a flat midday sun. For interior renders, supplement natural light with artificial sources placed where you'd actually find them in the real space: ceiling fixtures, floor lamps, sconces.
In MyArchitectAI, just go to Set Atmosphere tool, and pick a lighting conditions preset:
If your renderer supports HDRI (image-based lighting), use it. An HDR sky image wraps the entire scene in realistic ambient light that picks up on reflective surfaces and fills shadowed areas with color, something a single directional light source can't replicate. Most professional SketchUp renderers (V-Ray, Enscape, D5 Render) support HDRI out of the box.
Soft shadows also matter. Hard, sharp-edged shadows read as artificial. Increase your sun's softness setting or use area lights to get diffuse, realistic shadow edges.
The flat, untextured materials that come with a SketchUp model are the second biggest obstacle to photorealism. Real surfaces have variation, micro-detail, and physical properties that basic flat colors can't convey.
When assigning materials for SketchUp rendering, look for PBR (physically based rendering) textures that include separate maps for color, roughness, and sometimes a bump or normal map. A wood floor texture, for example, should have visible grain variation and a slight sheen, not a single tiled bitmap at 100% reflectivity.
Roughness is often overlooked. Polished concrete reads very differently from brushed concrete. Matte paint behaves differently from eggshell. Spending ten minutes adjusting the roughness and reflectivity values of your five or six most prominent materials will do more for realism than adding dozens of entourage objects.
High-resolution textures also make a real difference. A 512x512 texture tiles visibly and looks pixelated up close. Most current material libraries offer 2K or 4K assets. Use them.
In MyArchitectAI, you can test different textures using the Change Textures tool. Select an area to edit, pick a new texture from the library (or upload your own), scale it, and generate a new variation:
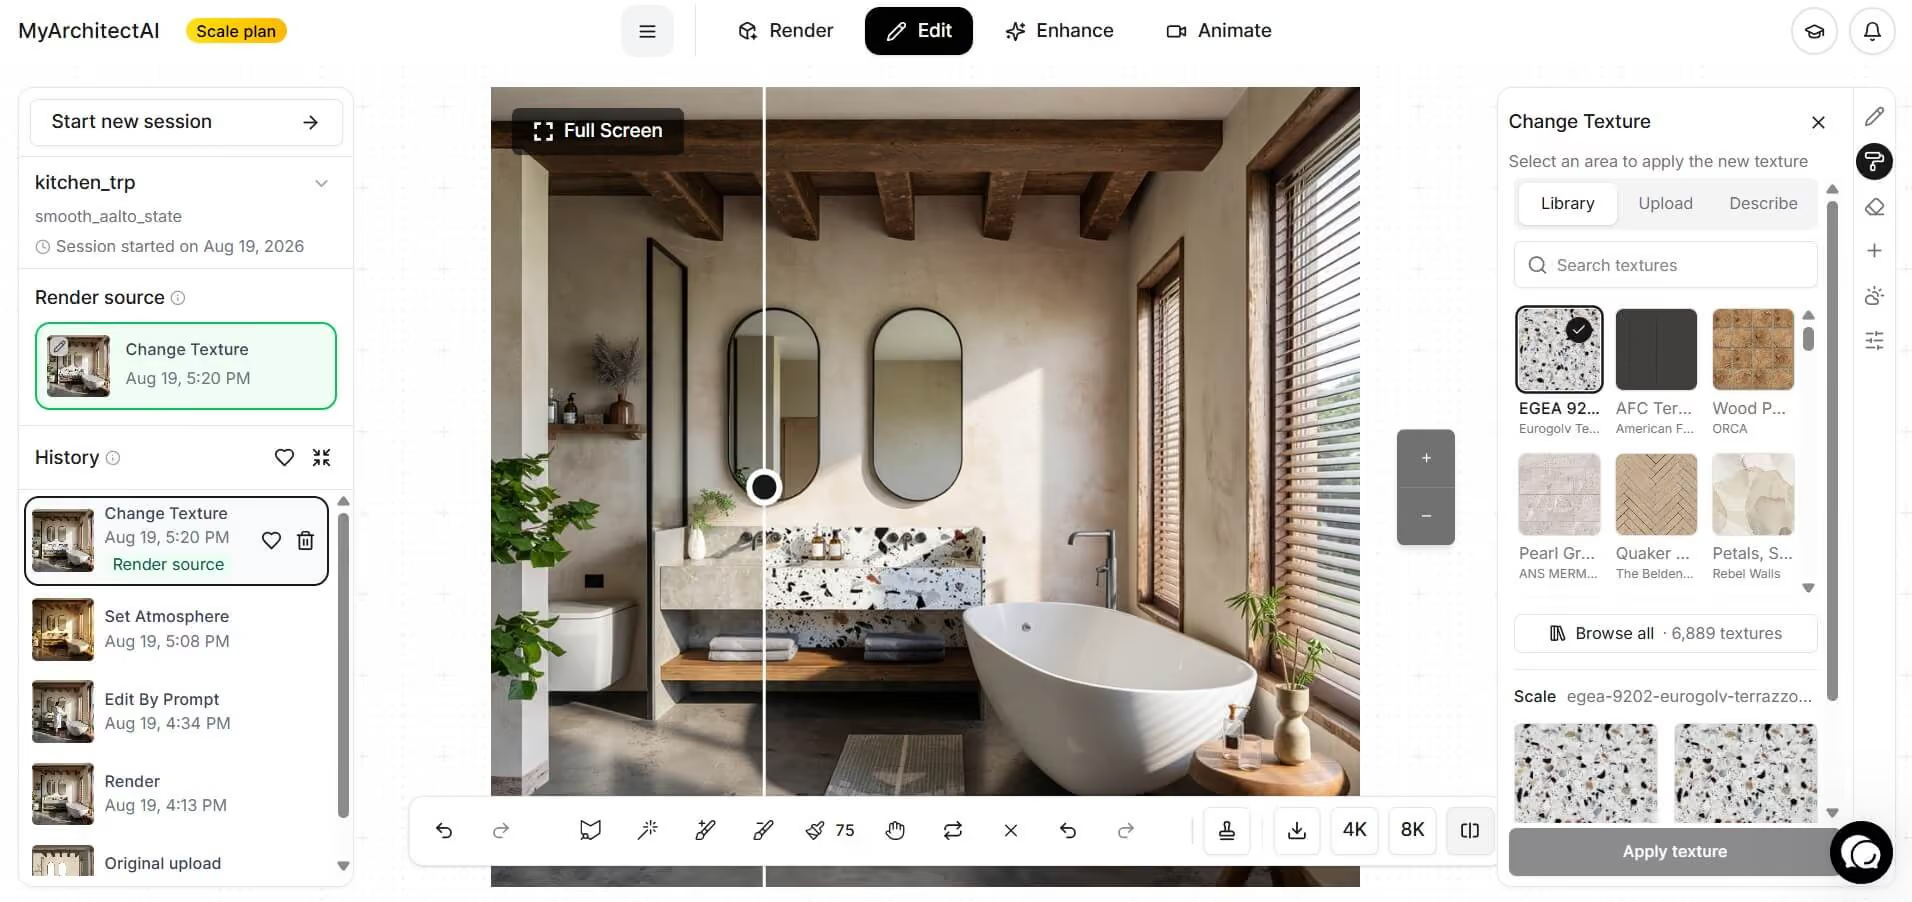
An empty room or a bare exterior site always looks like a test render, no matter how good the lighting and materials are. Entourage (people, vegetation, furniture, cars, and accessories) provides two things: scale and life.
People placed at eye level are particularly effective for communicating scale in both exterior and interior shots. Vegetation softens hard architectural edges and brings warmth to otherwise minimal compositions. For exterior renders, a credible site context (a sky, surrounding buildings or landscape) goes a long way.
Be deliberate about placement rather than filling the scene randomly. A few well-positioned figures and plants tend to read better than a crowded scene.
SketchUp's default field of view is wide by photographic standards, which tends to produce a slightly distorted, unnatural look. For interior renders, a focal length equivalent of around 24mm to 35mm often produces a more convincing perspective. For exteriors, 50mm to 85mm can feel more grounded.
Eye-level framing, with the camera positioned at roughly standing eye height (around 1.6m to 1.7m), makes renders feel inhabited rather than diagrammatic. Two-point perspective, where vertical lines stay truly vertical, is the standard for architectural presentation work and reads as more composed than tilted camera angles.
Even a good SketchUp render benefits from a light post-processing pass. Slight contrast adjustments, color grading (a subtle warmth or cool tone depending on the mood), and a small amount of vignetting can make an image feel more polished. Most rendering engines have some post-processing built in, so you don't necessarily need Photoshop for this step.
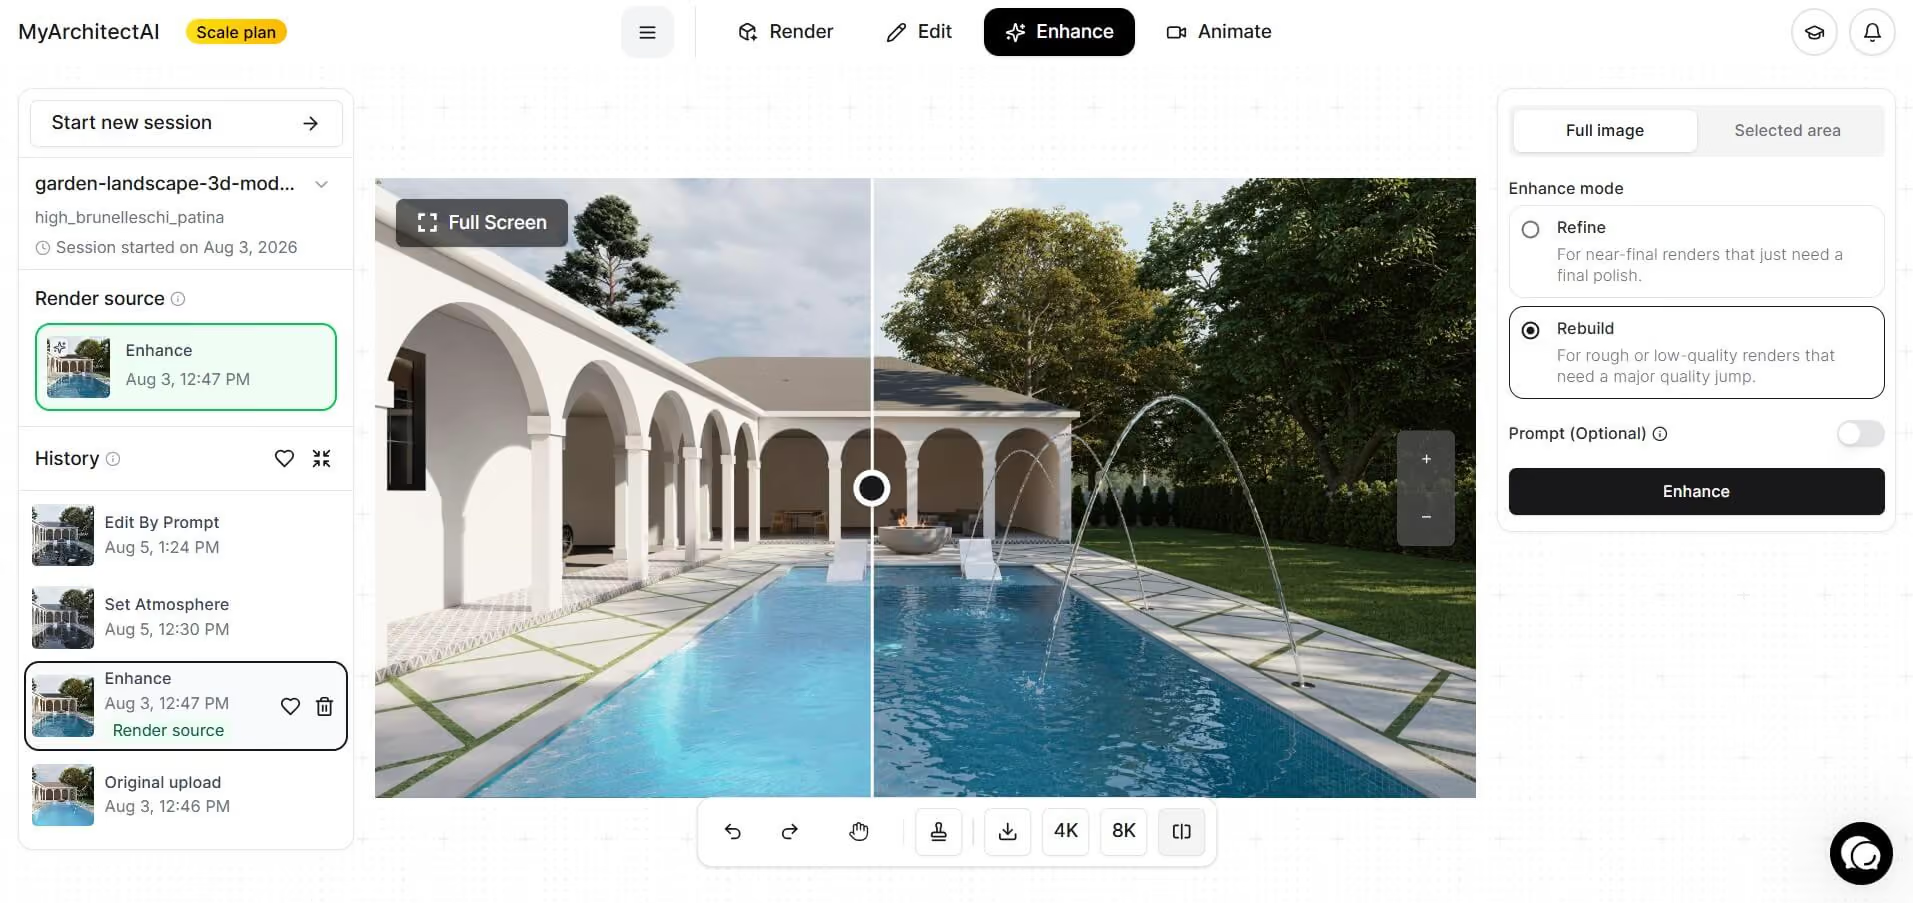
Keep the adjustments subtle. Viewers notice when an architectural render has been over-processed: blown-out highlights, crushed shadows, and aggressive saturation work against credibility.
Hopefully, this guide gave you more clarity on how to render in SketchUp using different methods.
As you've probably noticed, AI renderers are a better fit for the ideation stage of the project thanks to their speed, while physically-based renderers help you get the necessary level of detail needed for the final design, especially in large, complex projects.
So pick a tool depending on your project needs, and start visualizing your SketchUp designs today!
'Best' depends on your needs - if you mostly care about speed, ease of use, customization, or cost. We wrote a separate guide comparing the best SketchUp renderers, so you should check it out.
Rendering architectural and interior designs takes from seconds to even hours, depending on the method you use. AI rendering is the quickest and usually takes no more than a minute per scene. Rendering with physically-based renderers is much more resource-intensive, and can take multiple hours per scene, depending on your scene, settings, and hardware.
SketchUp is a 3D modelling software and doesn't have any in-built rendering features. To visualize your models, you'll need a third-party extension or standalone software, such as those listed above.
Rendering on Mac computers can be a struggle as many popular archviz tools (like Lumion and D5) are not compatible with Apple laptops. Here's a list of renderers that work on Mac computers.
To visualize your designs for free, you can use one of the tools offering a free plan or trial, such as MyArchitectAI, or SketchUp Diffusion. Otherwise, Blender is 100% free and open-source but has a significant learning curve.

.webp)