This quick guide will equip you with everything you need to know to get the most out of MyArchitectAI.
MyArchitectAI currently accepts .jpg, .jpeg, .png, and .webp file formats.
You can upload an interior or exterior CAD design export, sketch, or a render you'd like to improve or edit.
To ensure the best results, you should remove any objects or shapes that you don’t want to see in your rendering. This is because our AI engine detects lines and shapes so e.g. dimension lines could be interpreted as lamp posts.
Once your input image is ready, select what you'd like to do, and let’s start creating.
.jpg)
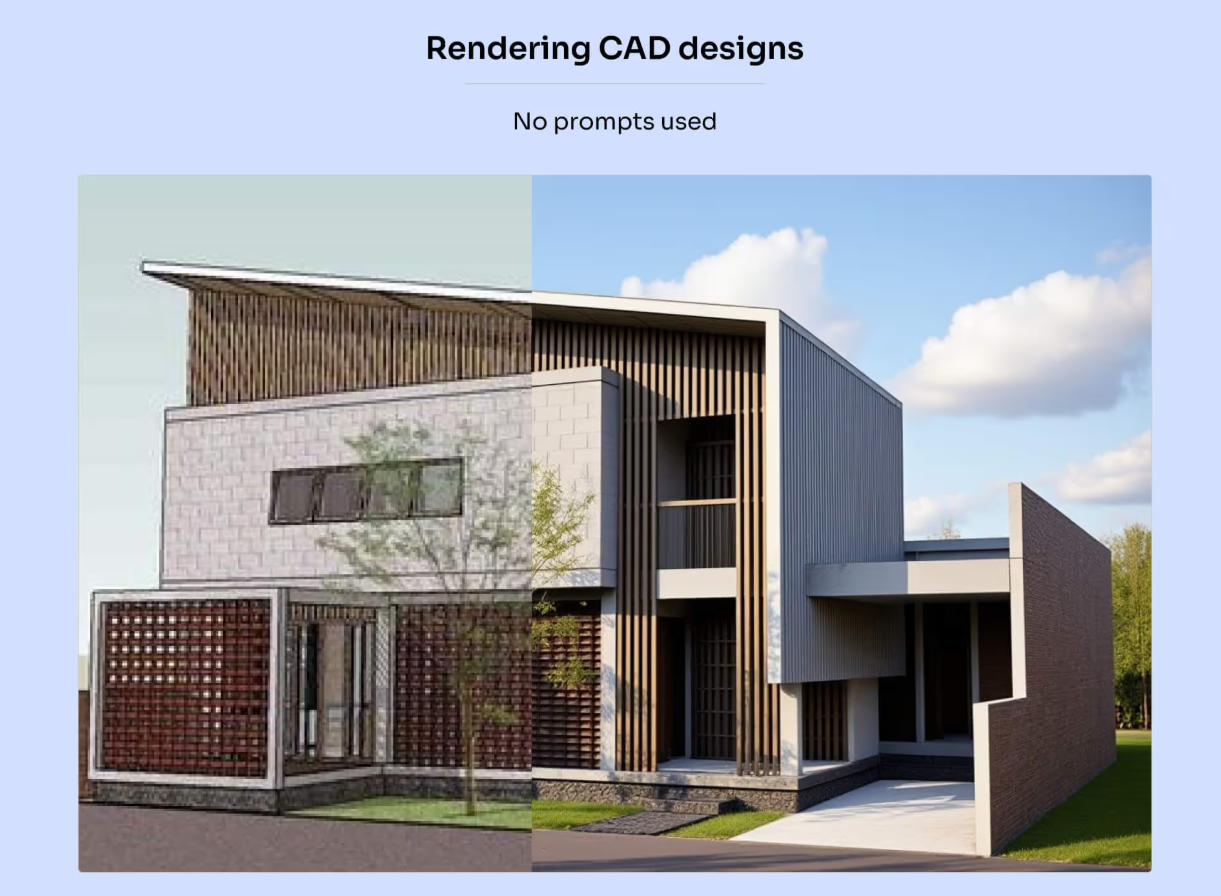
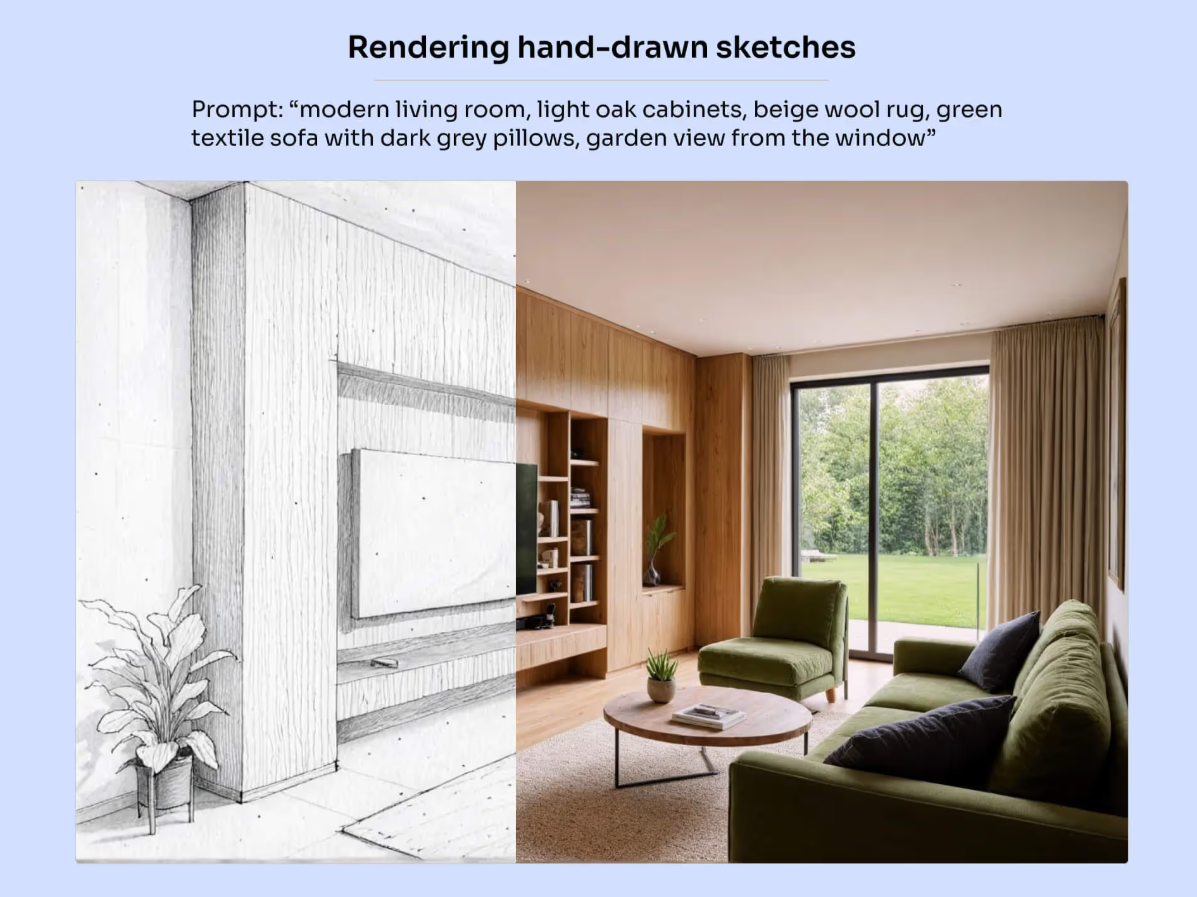
Render is our most versatile engine, optimized for visualizing both CAD designs and hand-drawn sketches (and in some cases also enhancing renders from other tools).
The Render tool supports scene exports from any CAD software, including SketchUp, Revit, Archicad, and more. It works with 3D views and elevations. Floor plans are not supported yet.
It preserves colors, materials, and textures from your uploads, while also letting you add landscapes, adjust lighting, and change the weather.
Quick video overview of how it works:
This engine is optimized to work with textured designs without any prompts at all.
Just select if you're working with an interior or exterior scene, leave all other settings unchanged, and click Render.
If you want to customize aspects like landscape, lighting, or weather, you can add a prompt.
To do that, switch back to the original image and describe your scene using comma-separated keywords. For best results, keep the prompt concise, and follow @Prompting best practices.
We don't recommend using Visual Style when working with textured designs, unless using a conceptual style, so keep this option unchecked.
If you’re new to prompting, you can use the Prompt Builder. It lets you select from predefined keywords instead of writing everything manually. You can always fine-tune the prompt afterward.

When working with exterior elevations and other untextured designs, there are 2 approaches:
Describe your scene using comma-separated keywords, including all key aspects of the design, such as materials and landscape. For best results, follow @Prompting best practices.
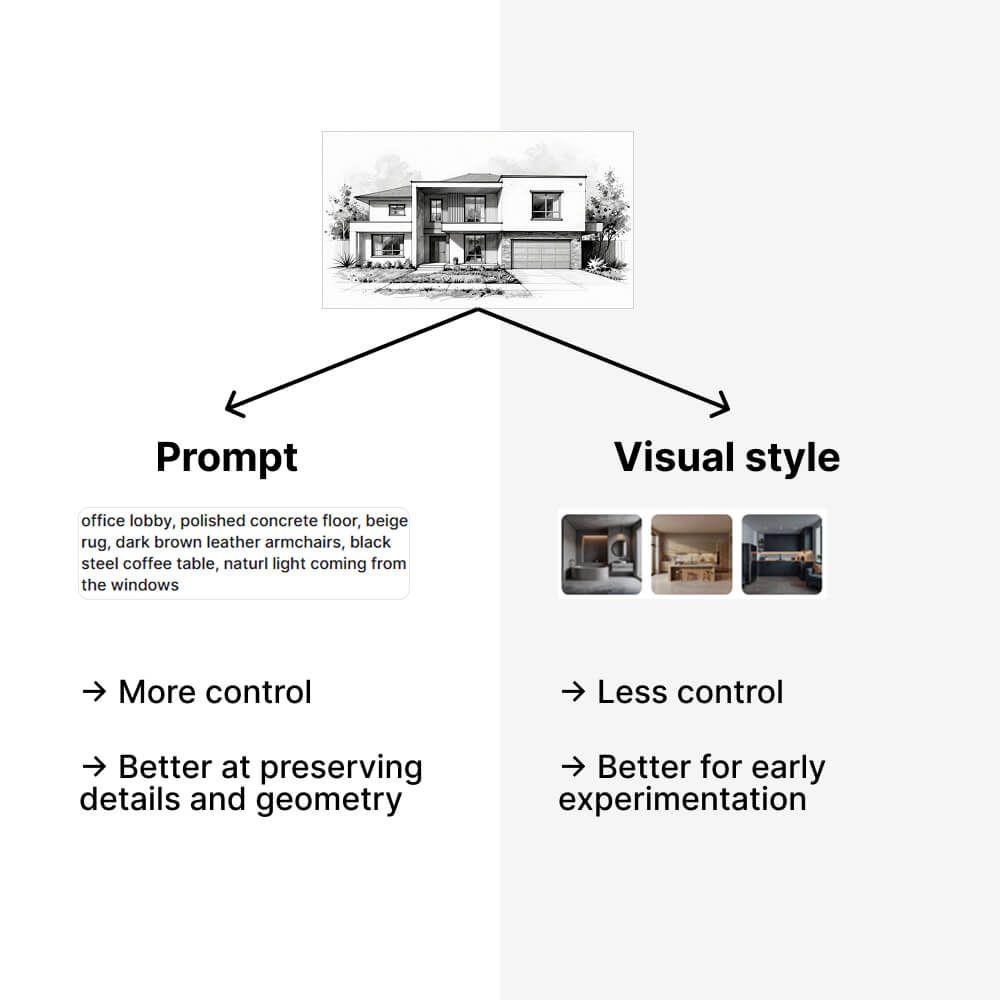
If you’re not set on specific details yet and want to show your client different concepts, you can skip the prompt and use the Visual Style setting instead.
Here, you can choose between photorealistic or conceptual styles, or upload your own reference image.
Photorealistic and Custom styles use your selected (or uploaded) reference image as inspiration and blend it with your design to generate a unique concept.
Conceptual applies a predefined aesthetic to your image with no additional settings. Use it to emphasize the overall idea and spatial concept, helping clients focus on intent and composition rather than early-stage details.

If you pick Photorealistic or Custom, use the Style Strength slider to control how strongly the reference image influences the render. Higher values make the result look closer to the reference image.
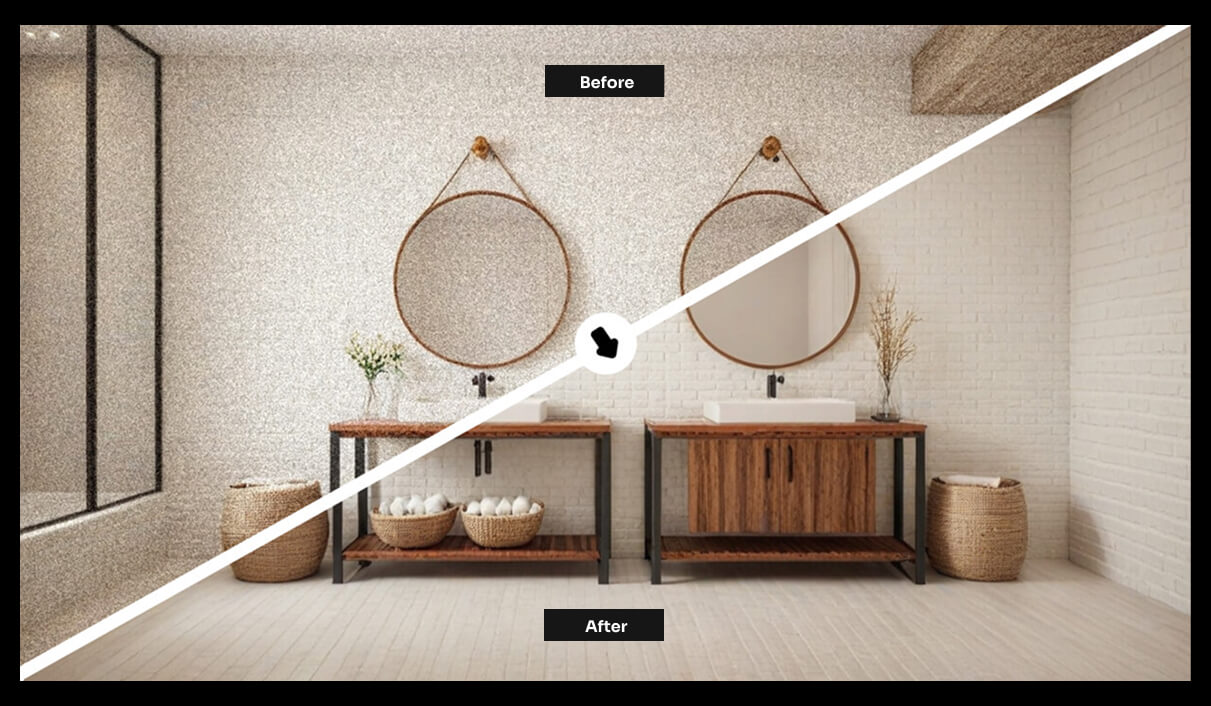
Here are some examples of what you can use the Render engine for:
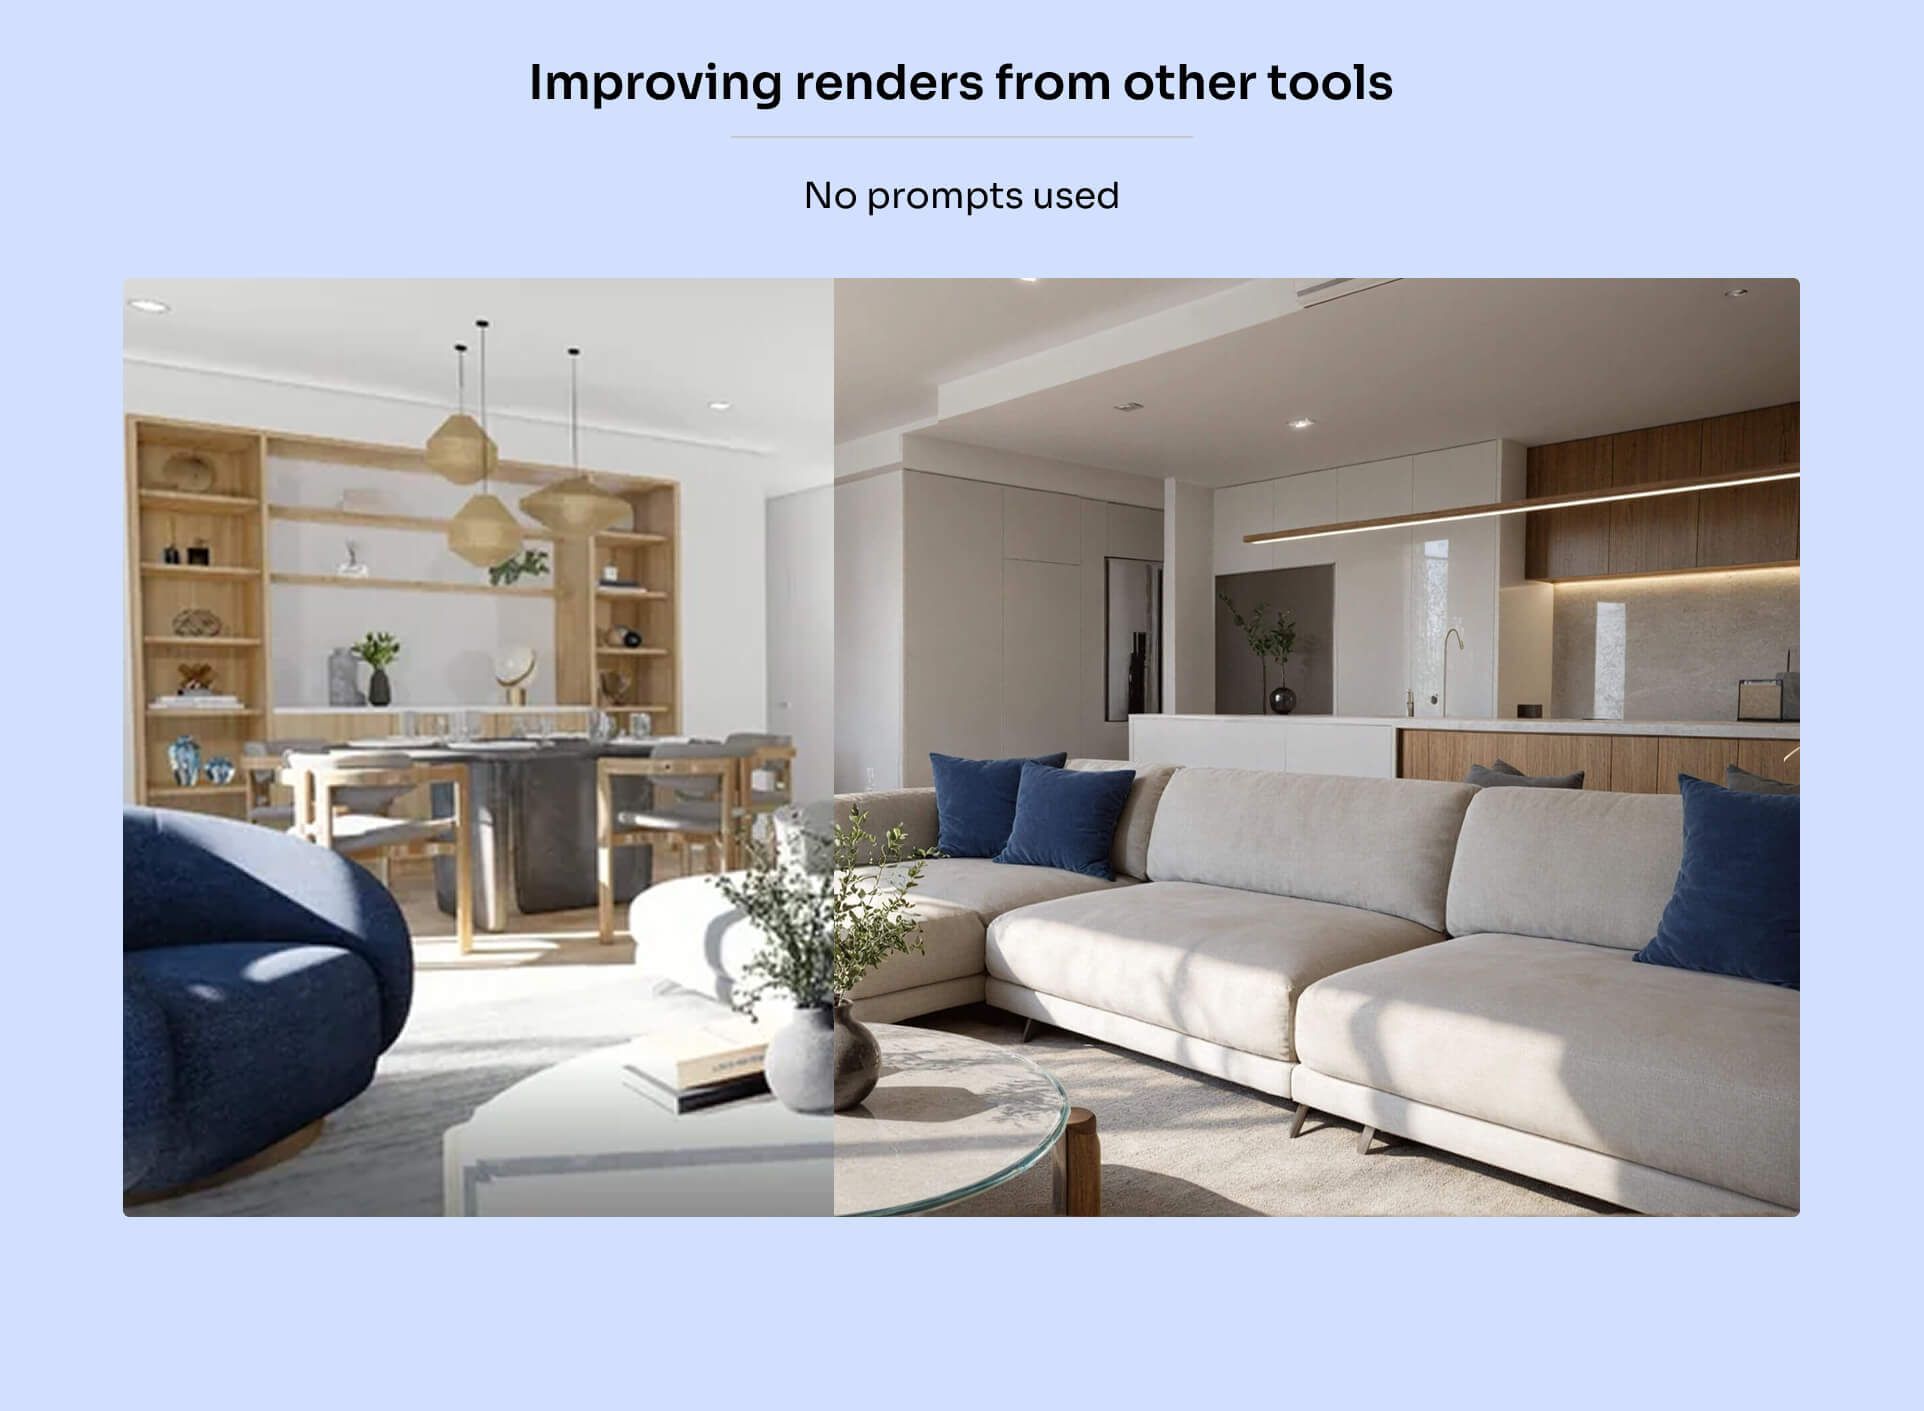
The enhance engine instantly improves image quality and resolution, making your renders sharper and more detailed.
Video overview:
Use the creativity slider to control how much artistic freedom the AI has—higher values for more creative control, lower values for subtle refinements that stay true to your original render.

And if your 3D people look like they're straight out of a video game, the enhancer can help with that too.

If you're not familiar with this concept, prompting is a method of communicating with AI applications by providing specific instructions on what you want to see in the output using text descriptions.
All our rendering engines are optimized to work without prompts, so using them is optional.
If you have any specific requirements, here are some best practices to follow.
First of all, MyArchitectAI is not a chat app (like ChatGPT for example), so instead of giving it instructions (create, make, render), just describe what you want your render to look like.
Second, try to keep the prompt as concise as possible, as overly long ones might confuse the AI.
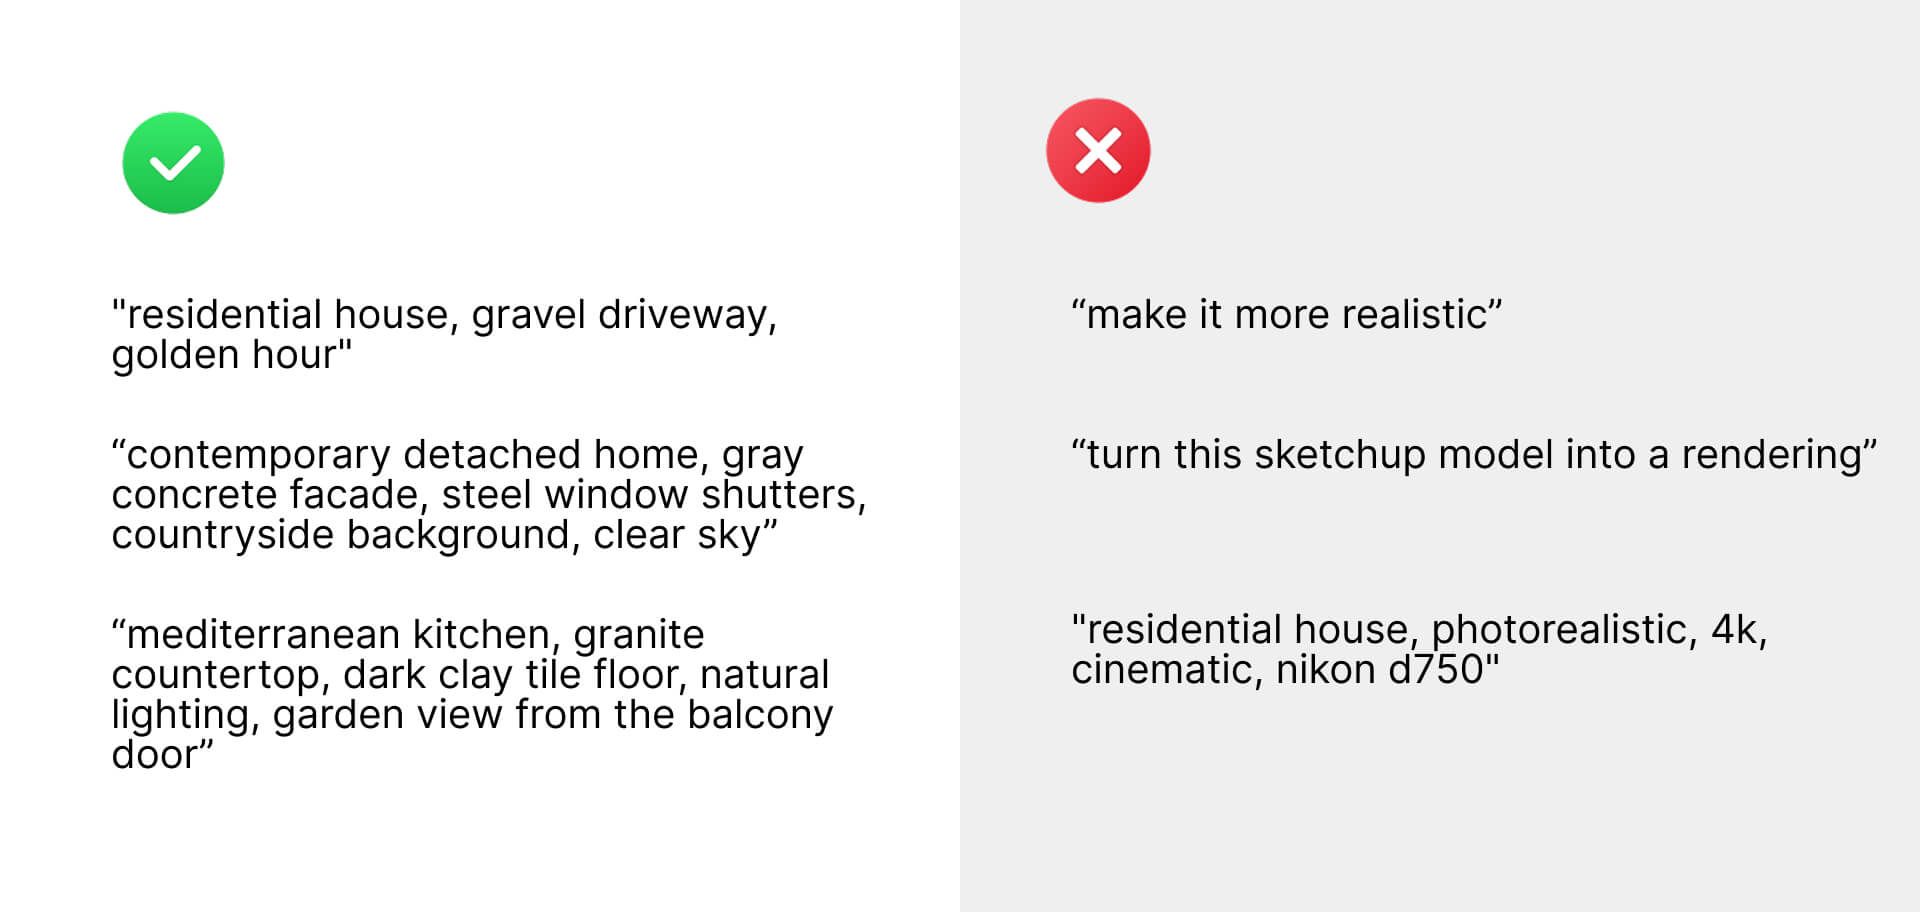
To give you an idea of what good and bad prompts look like, let’s have a look at a couple of examples of both.
✅ Good prompt example: “unfenced contemporary detached home, gray facade, steel window shutters, round shrubs around the building, plain concrete driveway, countryside background, clear sky”
✅ Good prompt example: “mediterranean kitchen, granite countertop, black chairs, dark clay tile floor, natural lighting, garden view from the balcony door”
❌ Bad prompt example: “turn this sketchup model into a rendering”
❌ Bad prompt example: “make it more realistic”
As you can see, good prompts follow a structure: {subject}, {scene details}, {setting} where the different components are separated by commas.
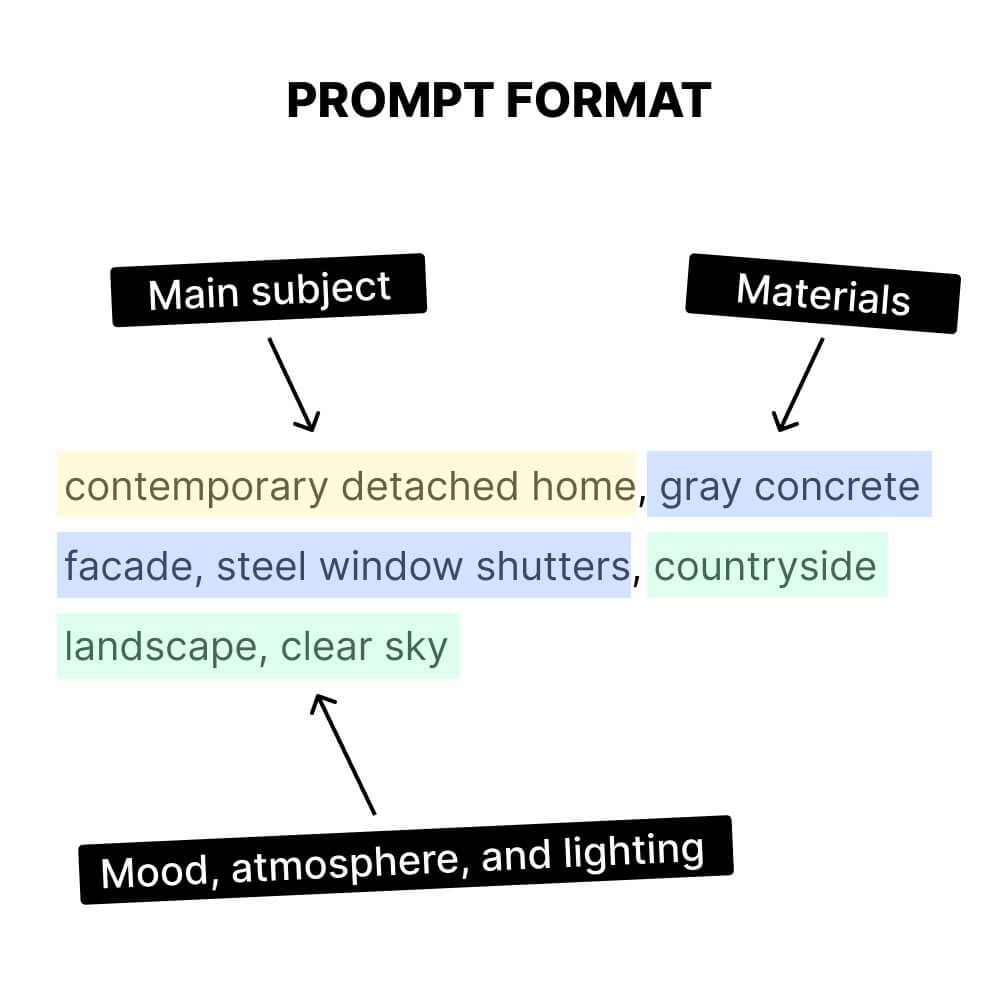
What's important, the order of components matters - those that are at the front of the prompt have more impact on the rendering than those further back.
Here are some of the most impactful elements you can include in your prompts:
Including more keywords in your prompt won’t necessarily produce better results though.
We recommend starting with one broad keyword describing the scene and style, e.g. "modern residential home".
Then, check how the app interprets different elements of the scene, and iterate from that by adding more specific keywords about different objects, e.g. "modern residential home, beige facade, sunrise".
It's worth generating a couple of renders for each of your prompt variations as MyArchitectAI will create different results each time. You can even leave your prompt unchanged and just click the "Generate" button to create a new variation using the same settings.
A couple of other things to keep in mind:
For tips on using the editing mode, check out this guide.
So experiment with different settings and see what works best for your designs.
And if you have any feedback, let us know in the live chat how we can make MyArchitectAI better for you.