Have you ever spent hours modeling, tweaking materials, creating custom textures, and setting up sophisticated lighting in Rhino just to end up with a flat and not-so-satisfying still render?
You’re not alone.
While Rhino is often the go-to software for creating 3D models for its precision and a more forgiving learning curve compared to its counterparts, many find rendering in Rhino somewhat limiting, as if they’re hitting a wall.
Yes, Rhino comes with its built-in renderer, but most professionals say it’s not the best when it comes to turning geometry to realistic visuals, especially in architectural scenes.
This is where plugins and third-party renderers come in handy.
In this guide, I’ll show you how to render in Rhino using its built-in renderer as a starting point, then explore more advanced tools: both AI-assisted and physically-based rendering engines like MyArchitectAI and V-Ray.
There’s no single “best” way to render in Rhino. It depends on what your goal is. Consider the timeframe of your project, the level of realism needed, and, of course, your skillset.
Here are three ways you can render in Rhino:
Here’s how they stack up:
Let's go through each of these methods in detail.
Without plugins or AI tools, how well can Rhino 3D’s built-in renderer do?
Cycles, Rhino’s built-in rendering engine, is a free and capable tool for creating quick concept renders. It’s not the most advanced renderer available, but it gets the job done decently. It’s a solid starting point for beginners and works well for basic early-stage design visualization.
Cycles can handle lighting, various materials, custom textures, and adjustable camera angles to a reasonable extent. It’s able to produce realistic renders, though its results are slightly less realistic compared with the two methods we'll describe later.
How to use Rhino’s built-in renderer:
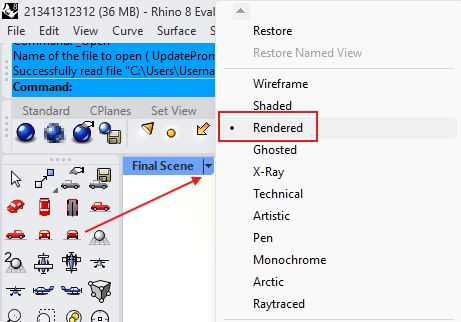
1. Go to rendered view. This switches to Rhino’s real-time rendering mode. It allows you to see how your model will look with your preferred materials and textures when rendered.
2. Go to the Render menu, then open Render Properties. Here, you can choose which Render Engine to use. Make sure Rhino Render is selected. Next, set the output size for your still render and adjust the render quality according to your needs.
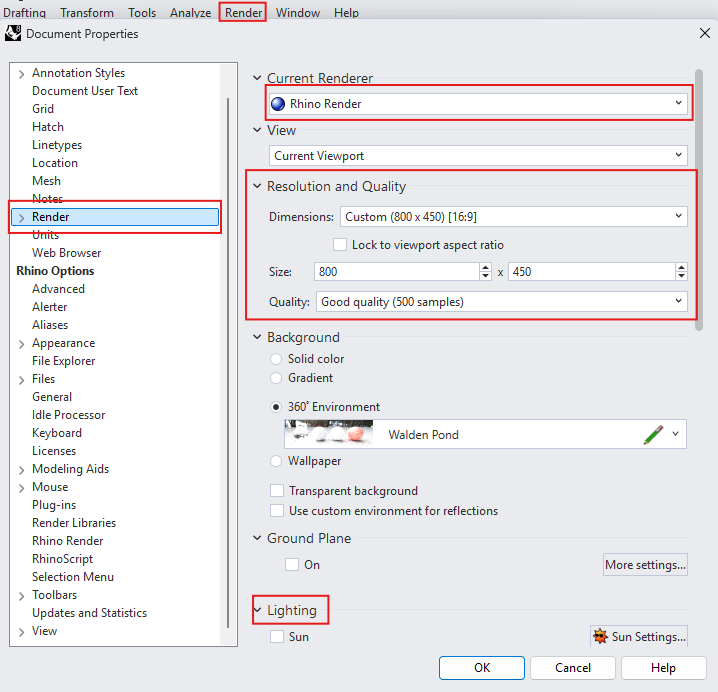
You can also customize your model’s background. Options include a solid color, gradient, environment, wallpaper, or a transparent background.
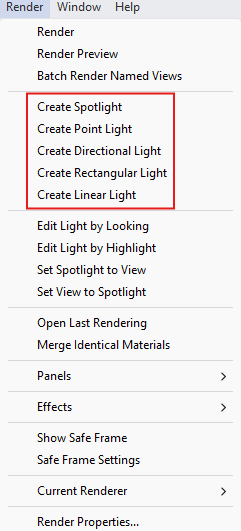
After that, make sure you’ve selected the appropriate lighting type:
3. Set up lighting. Depending on your architectural model, you can add extra lights, on top of the Sun or Skylight lighting, to make your scene more dynamic. Under the “Render” menu, you can choose between the Spotlight, Point Light, Directional Light, Rectangular Light, or Linear Light.
4. Position your camera. A good still render is not all about materials, textures, and lighting; it’s also about camera position.
Using the pan, rotate, and zoom tools, find a good view. To save your view, click the “Named View” button in the right side panel. Then, click the “Save As” button in the Named View tab to save your current view.

5. Click on the Materials button in the toolbar to open the Materials window. Then, click the Add Material button to create a new material.
Since we’re working on architectural renderings, make sure to select Physically Based materials. These materials are designed to interact with lighting in a realistic way, helping you achieve the highest level of realism possible.

Once you’re in the material creation window, start by choosing the base color of your material. You can then adjust roughness and opacity to control how the surface interacts with light and how transparent it appears.
Next, go to the “Detailed Settings” dropdown, click the folder icon to add a texture. You can download textures from third-party sources, save them locally, and then import them here to give your material a more realistic look.

To assign this material to an object in your scene, right-click on the material swatch, then click “Assign to Object.” Finally, select an object in your scene to apply the material.

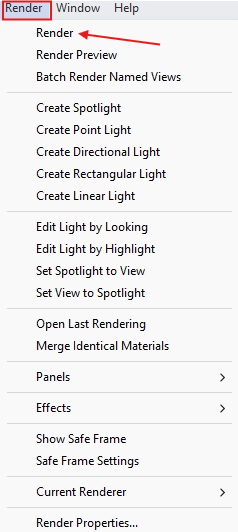
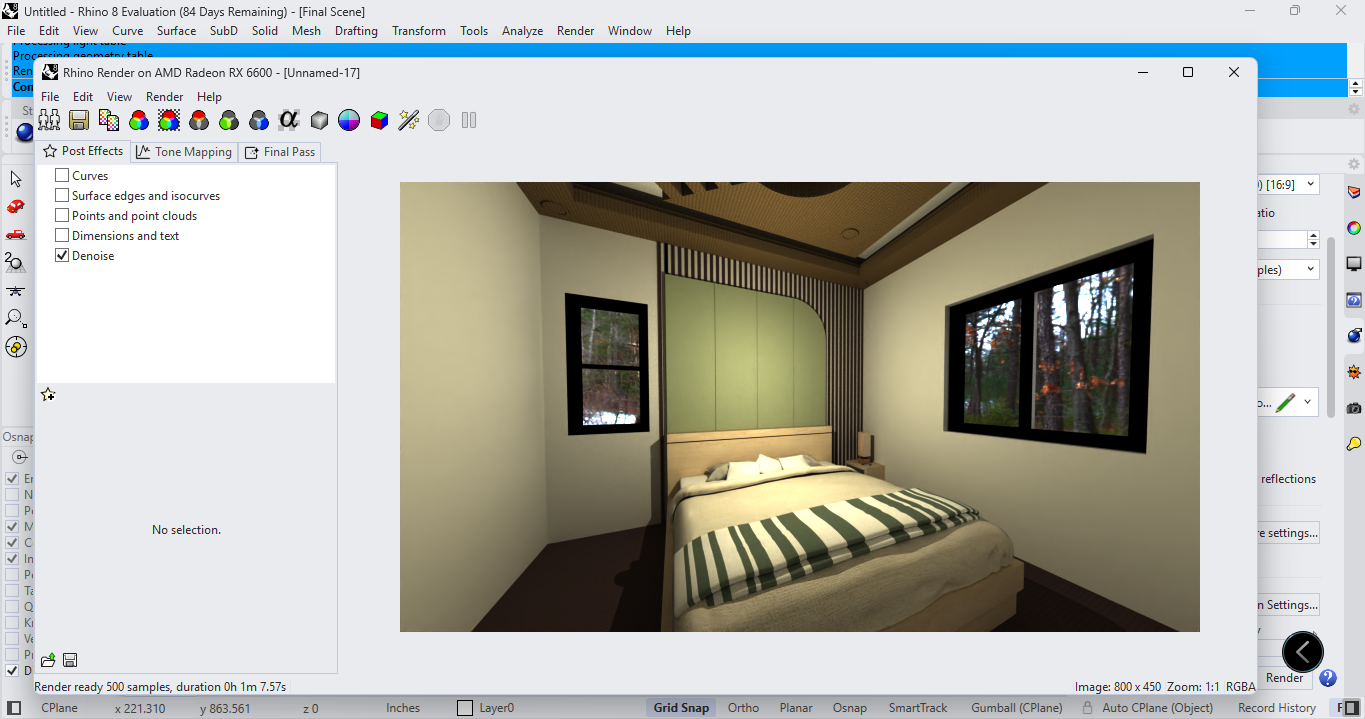
6. Rendering. Once everything is set, open the Render menu and select Render. Rhino will then generate the image using your chosen render engine. You can also simply type “Render” in the command bar to start the process.
Render times depend on the quality settings you choose and the complexity of your scene. In this example, an interior scene set to “Good Quality” (500 passes) with minimal lighting, materials, and textures took 1 minute and 7 seconds to render. You can stop the process anytime if you’re already satisfied with the result, since Rhino gives you a real-time preview of the still render as it’s being processed.
Here’s the final render at 500 passes:
To dive deeper, pick one of the Rhino courses from our recommended list.
The traditional way of producing photorealistic renders involves a very tedious process that can take days or even weeks. It typically includes concept planning, modeling, adding lights, textures, and materials, then rendering, and finally post-processing to produce the final output.
In fact, 60% of the work and time spent on a final render happens after modeling.
With AI renderers like MyArchitectAI, the rendering process takes just seconds.
It removes most of the repetitive work that usually comes after modeling - there’s no need to fine-tune lighting, look for the right textures, or build complex material layers, since the AI engine handles those automatically.
It means you can focus on the creative side and spend less time on technical setup.
Here’s how to render with Rhino using MyArchitectAI:
1. Sign up for a free account.
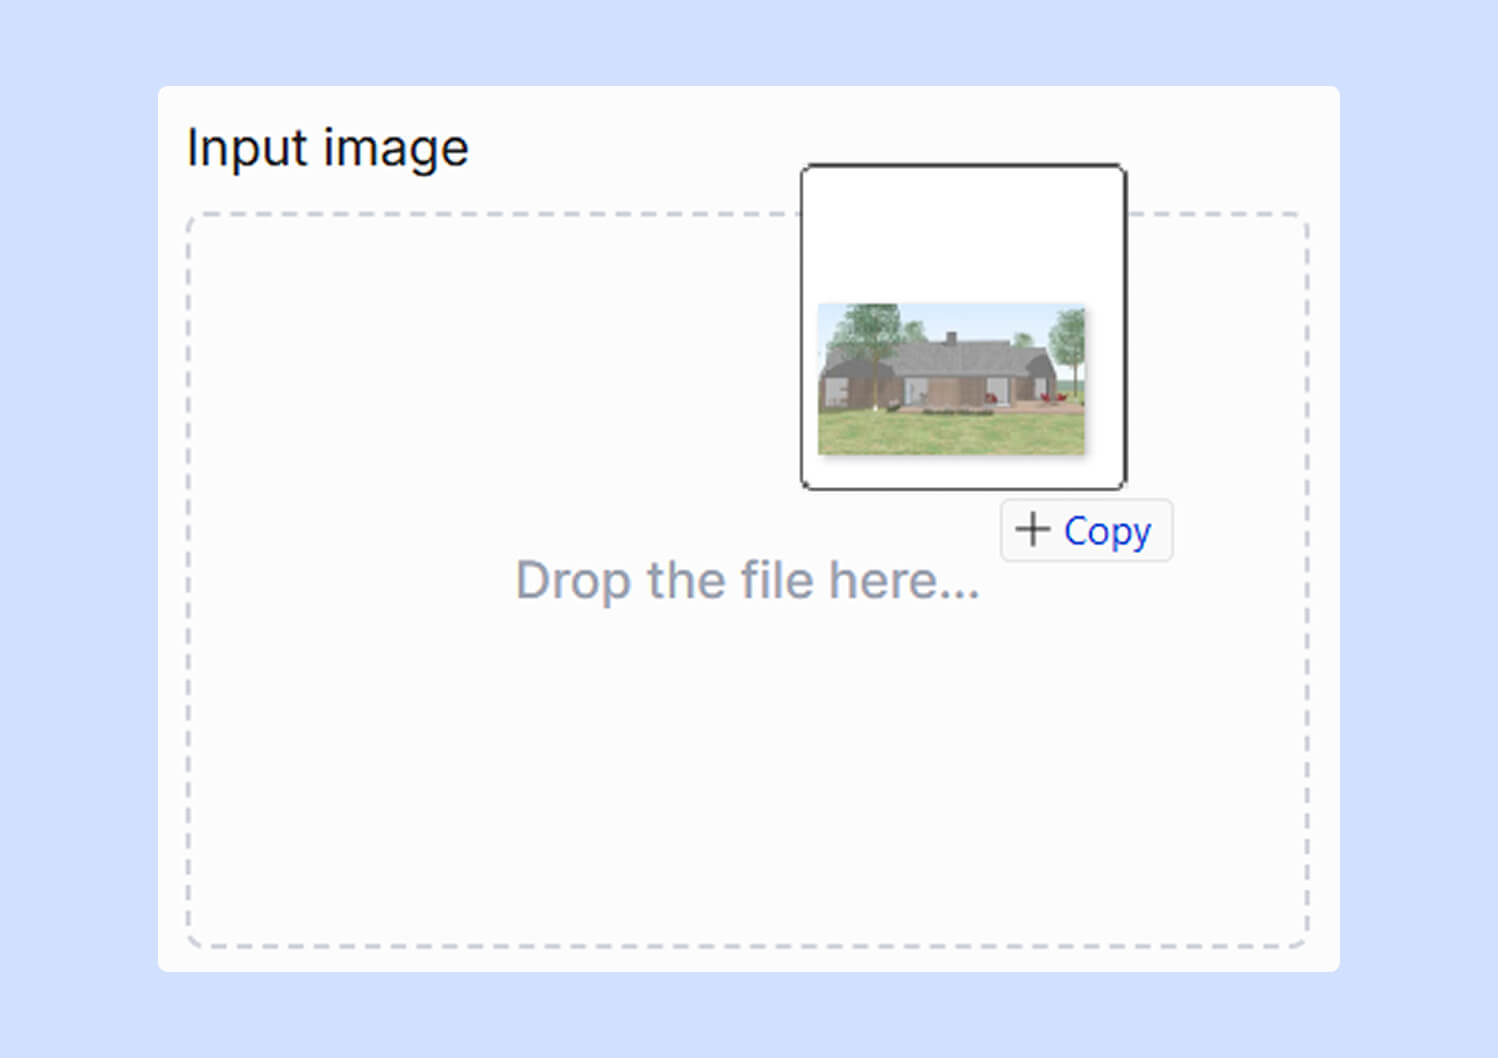
2. Upload a screenshot or an exported image of your Rhino 3D model.
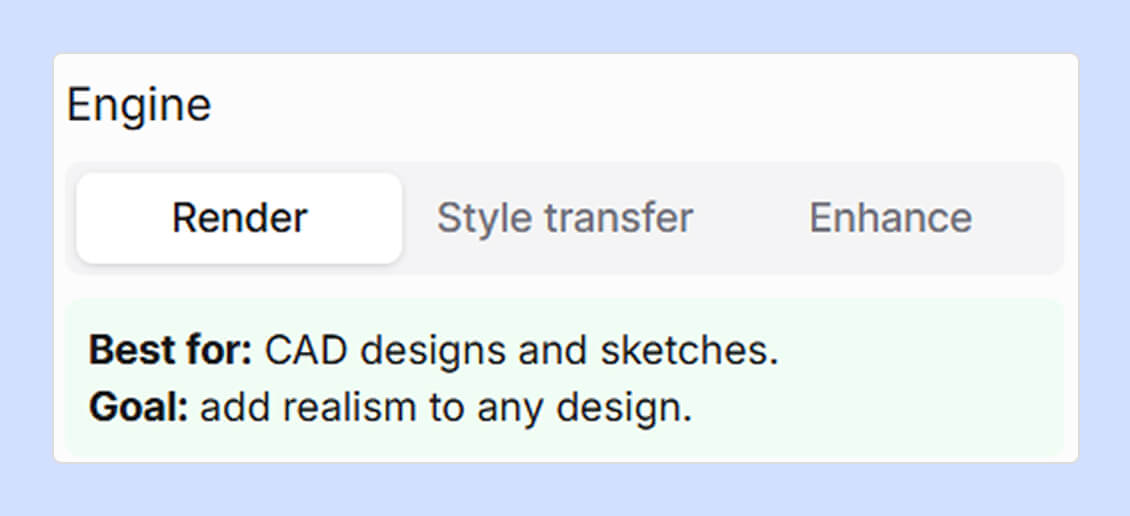
3. Choose the "Render" engine.
4. To fine-tune the details, you can provide the AI with a scene description explaining how you want the final render to look, including the theme, materials, lighting, and overall mood. This step is optional.

5. Generate. In 10-15 seconds, you’ll have a finished render of your scene. Geometry, dimensions, textures, and colors are preserved.
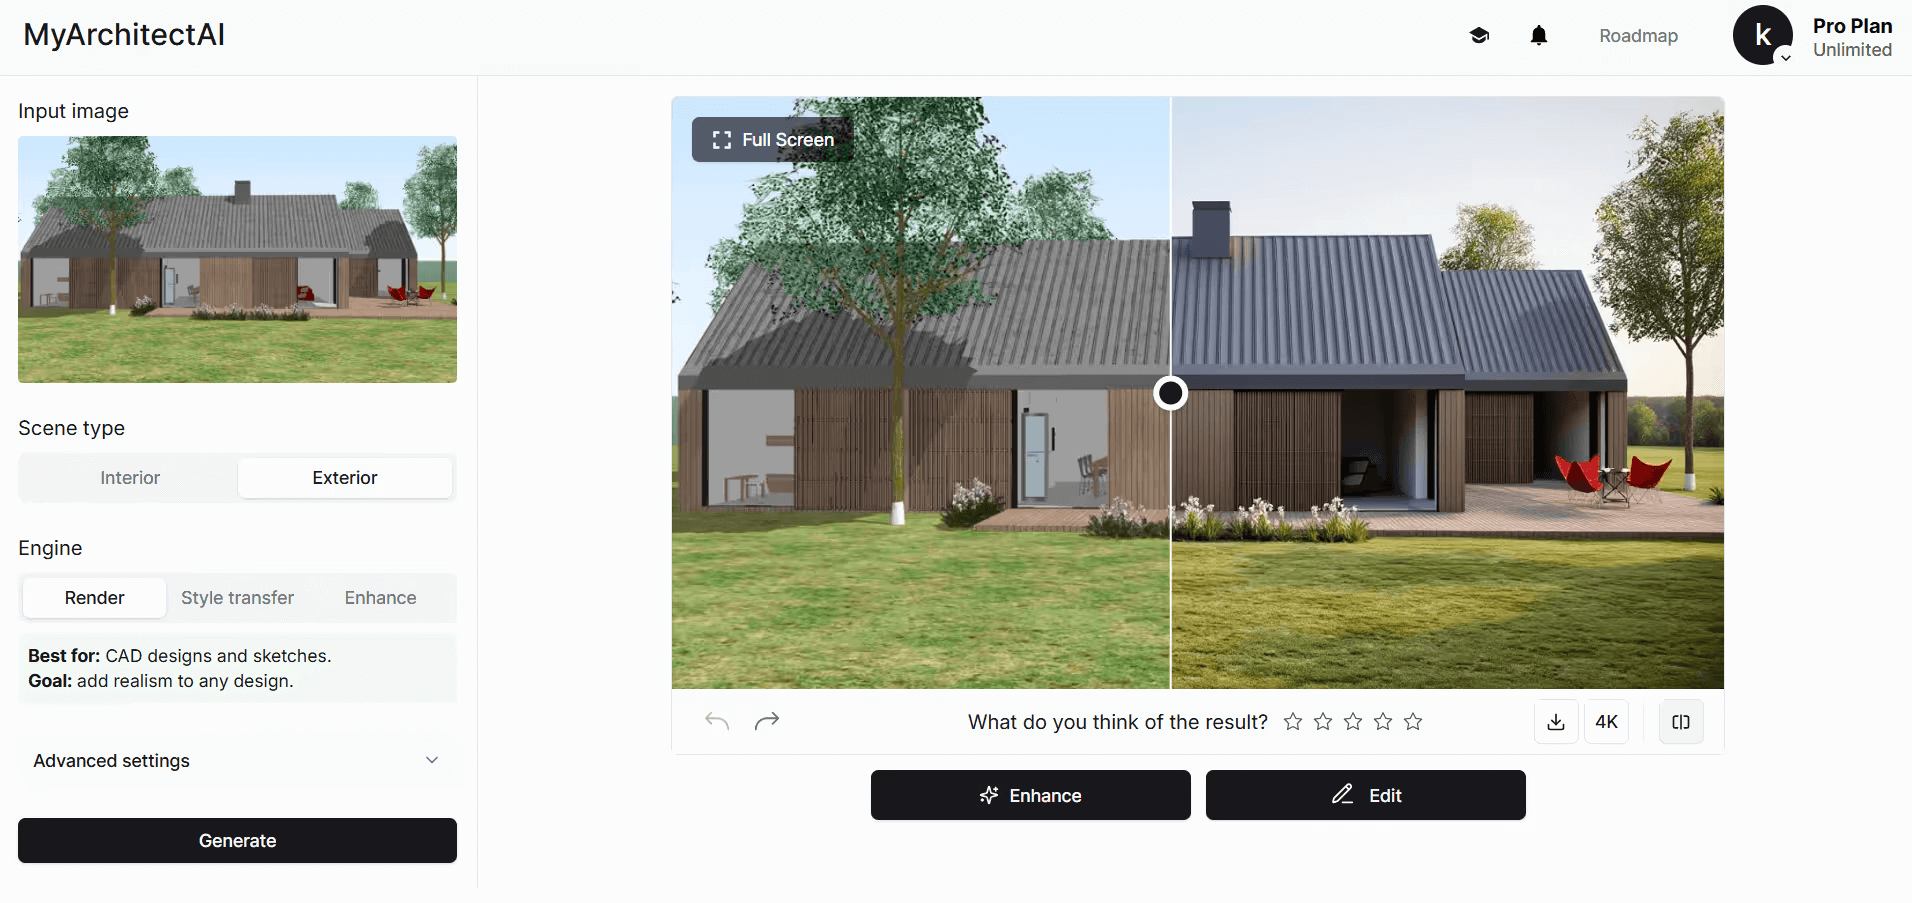
Need any adjustments? Just go to the AI editing mode and make any change you want just by describing it with words, e.g., "turn it into a dusk scene with soft window glow, and add a few clouds to the sky."
.png)
When you're happy with the result, click “Enhance” to upgrade the render quality in about 30 seconds to give it another pass.
With AI renderers, revisions become faster, easier, and far less technical, letting you spend your time refining ideas instead of managing details.
If you’re working on large-scale projects or competition visuals, Rhino’s built-in renderer has its limits, and AI tools for Rhino don’t yet offer full control over every detail.
That’s where physically-based renderers like V-Ray, Enscape, or Lumion come in.
They provide full creative and technical control, advanced lighting systems, high-quality material libraries, and, not to forget, powerful rendering engines that can produce life-like visuals.
However, this also comes with certain considerations, such as a steeper learning curve, higher hardware requirements, licensing costs, and longer render times.
In this guide, we’ll use V-Ray as an example, as it’s the most commonly used third-party 3D rendering plugin for Rhino.
1. Subscribe to a free trial or a paid subscription.
2. Install the software, following the official Chaos installation guide for Rhino.
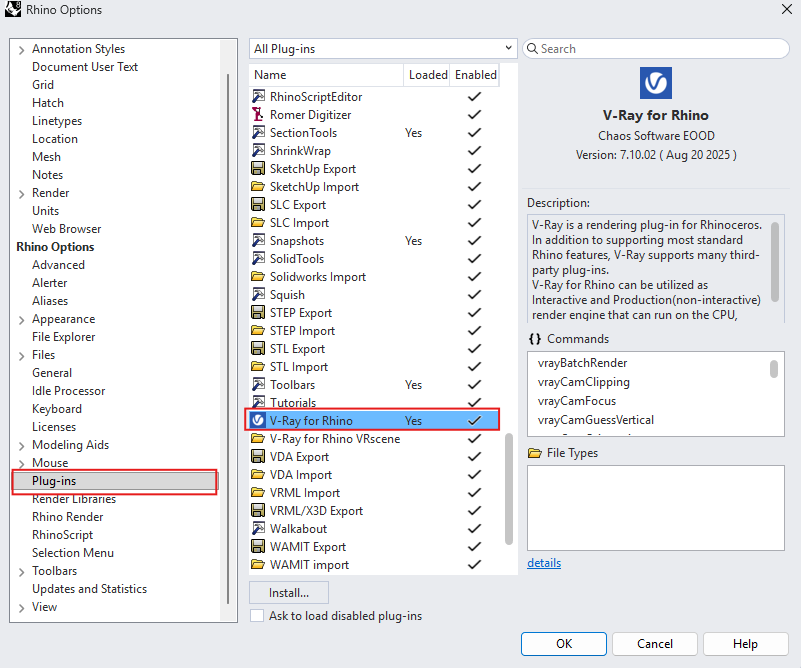
3. Activate V-Ray in Rhino. Open Rhino, go to the Plugins menu by entering “PlugInsManager” in the command bar, then select V-Ray to activate it.
4. Set V-Ray as the Current Renderer. Go to Render Menu > Current Renderer > Select V-Ray.

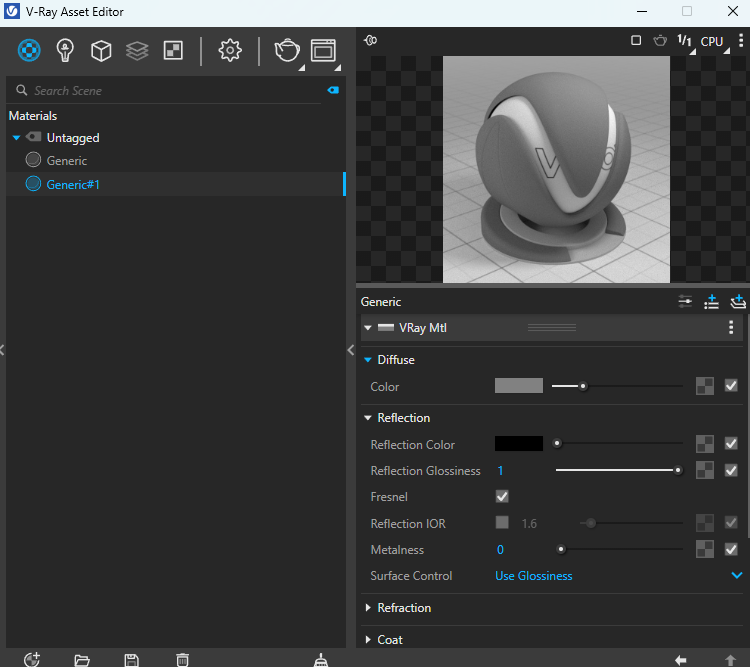
To access Render Settings, go to V-Ray in the menu bar, select Asset Editor. In the Asset Editor, click the Settings icon.

If you want to learn more about each individual setting, you can find detailed render settings guidelines on Chaos' website.
Without lights, you just have a 3D model. V-Ray gives you the option to choose from a variety of lighting types to tell your story.
Lights are what make a scene realistic. But remember, lighting isn’t just about brightening up a space. It’s also about controlling shadows, contrast, and even darkness to create mood, depth, and realism. The absence of light is just as important as its presence. Strategic lighting (and lack of it) helps emphasize materials, shapes, and focal points in a scene. You can do all of these within V-Ray.
To add lights:
1. Go to V-Ray > Lights.
2. Select a light type and click on your scene to place it.
3. Adjust the light’s area by dragging or typing a value.

Depending on your scene, here are different types of lighting you can use:
Materials define geometry in your model. It transforms them into believable surfaces.
Materials will make objects look what they’re supposed to be. A rectangle can be anything, but with the right material, it can be a floor mat, a glass table, a concrete slab, or even a mirror.
With V-Ray, you can create your own materials to simulate any object you want.
To create and apply materials
1. Open Asset Editor (V-Ray > Asset Editor)
2. Click Create Asset > Material, then select a material type.

3. With the V-Ray Asset Editor open, select an object in your scene, right-click the material, and choose Apply to Selection.

4. Edit material properties such as base color, roughness, reflection, metalness, etc. This will give your material some character — what makes wood look like wood, and what makes metal look like metal. Metal would have near-zero roughness, have higher reflection, and, of course, metalness.
Once your scene is ready:
1. Make sure V-Ray is set as the current renderer.
2. Go to Render Menu > Render, or simply type “Render” in the command bar. You can also go to V-Ray > Rendering > Render.
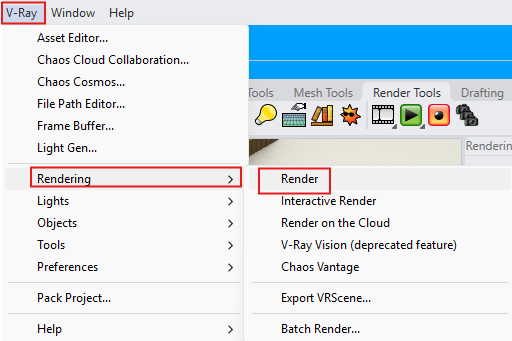
3. Wait for the render to complete, then save or modify the model as needed.
When the task is to create a 3D model, whether it’s an interior, exterior, or furniture model, Rhino quickly rises to the top as one of the best modeling solutions out there.
However, using Cycles, its built-in renderer, to finish the job isn’t always recommended, except for quick concepts or early-stage presentations.
So if you’re aiming for the highest possible realism and precision, V-Ray for Rhino is a great choice.
If you want to save lots of time while still producing photorealistic visuals, AI tools like MyArchitectAI can do the heavy lifting for you in seconds.
Mastering both methods makes you a rendering powerhouse, capable of producing renders with speed, realism, accuracy, and creativity, no matter what the project demands.
You can render in Rhino on a Mac using the Mac-exclusive version called Rhino 8: Metal, which runs 24 times faster than the Rhino 7: OpenGL version.
There are really no single “best” Rhino rendering settings. The ideal configuration depends on your goal and the type of output you want to achieve.
If you’re only creating a concept render for early-stage design, it’s best to use lower quality settings to speed up the process and perform more iterations. If it’s for a final presentation render, you should definitely switch to higher quality settings.
You can read Rhino’s official documentation on Render Settings to understand each option in detail.
It depends on scene complexity. The more objects, textures, lights, and the higher your render settings, the longer it takes. A more powerful computer also helps.
For example, a simple exterior render with only skylight or sunlight, basic materials, and few or no high-poly entourage objects can take as little as 30 seconds to 5 minutes.
The interior render example from our guide took only 1 minute, using simple textures and maximizing natural lighting.
Yes. Rhino comes with a built-in renderer for basic rendering. However, if you want photorealistic results, you’ll need to use a plugin or a third-party rendering tool like MyArchitectAI, V-Ray, or Enscape.
It requires advanced modeling, lighting, and texturing of your scenes, as well as setting the right camera angles, creating captivating atmospheres, and post-processing.

.webp)