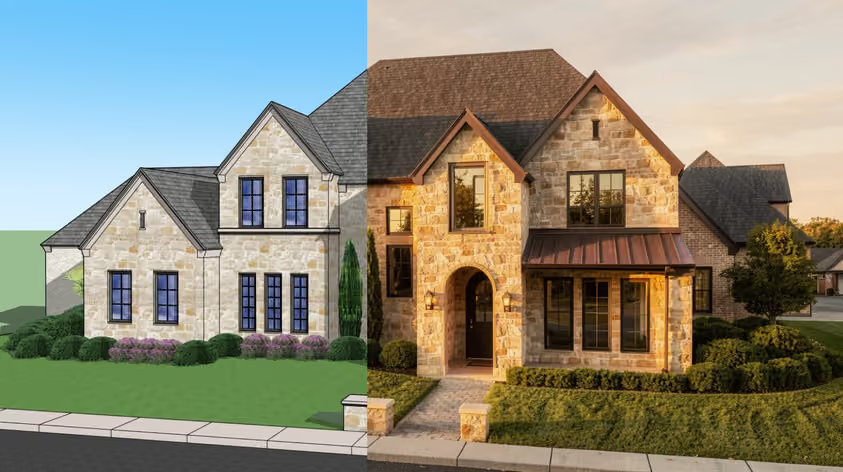
One hypothetical situation: you export a substantial lobby render from Enscape and spot things you want to fix before the client call. The windows look flat, the oak is too orange, and the person at reception looks like they’re floating. Those are three different jobs that require a streamlined architectural post-production workflow. But what kind of tool should you choose?
Editing options in Photoshop for architects mean better control over individual surfaces and easier precise compositing. AI can speed up changes that would take longer to build manually, especially when you’re exploring a different mood.
Here’s how to make the call. This guide follows a render from export to delivery, comparing both approaches with lower-cost editors at each step.
Good architectural visualization post-production can pull detail out of a flat image or tie a building into a site photo. Some changes are easier to manage in the model, though. If a revised finish appears in several views, update it there so each export reflects the same decision. Resolve geometry errors before rendering again. Our guide to best practices in photorealistic rendering explains how to prepare the scene.
Before you begin render post-production, save the finished RGB image (known as the “beauty pass”). Any masks you export must match its dimensions and crop so they line up in your editor.
Choose the additional passes according to the work ahead.
Keep all these passes in their original form and apply color adjustments to the beauty pass separately.
| Renderer | What to export |
|---|---|
| Enscape | Enable Export Object-ID, Material-ID and Depth Channel in the Output tab of Visual Settings. For a transparent background, enable Apply Alpha Channel with PNG, EXR, or TGA. Chaos export guide |
| V-Ray for SketchUp | Save RGB plus the render elements you’ll use. Assign IDs and add MultiMatte elements for targeted masks. If you want to adjust the contribution of existing lights after rendering, add Light Mix before the render. Save elements separately or use a multichannel EXR if your editor can access the channels. V-Ray output settings · Light Mix |
| Lumion | In Photo Mode, save your still with a Sky Alpha output for sky replacement and a MaterialID output if you need to isolate finishes or glass. Lumion sky replacement walkthrough · MaterialID example |
| Twinmotion | Assign layer IDs to the objects or groups you need. Export the beauty pass and selected render layers as masks or layers with alpha in PNG or EXR. Twinmotion creates a Sky layer automatically. Inspect glass edges and reflections before using isolated layers, particularly with Standard or Lumen rendering. Epic’s render layers guide |
For architectural post-production, save a layered master in your editor’s native format. Send AI tools a flattened copy and bring the result back as a separate layer. You can then use the original mask to bring in just the useful part. This also gives you a way to roll back one edit when a client asks for the earlier version.
Pick an anchor in the image. In a kitchen, that might be the specified cabinet finish. On an exterior, the limestone beside the entry. Get that surface close to its intended color under the scene lighting, then check what the same correction does to whites and shadows. A daylight-balanced image can still contain warm lamps. Keep the difference if it’s part of the lighting design.
Start with a Curves adjustment layer and set the overall contrast. Add a separate masked Hue/Saturation or Curves layer for a finish that needs its own correction. If the oak looks orange, select it from the material ID and work inside that mask.
Once a finish is approved, you can open the file a week later and change the oak again with the rest of the grade in place.
Use Curves and a masked adjustment in Photopea for much the same task. If you’re working on a set of views, keep the base correction consistent and adjust each image where the light calls for it. Copying the same curve everywhere may deepen the shadows in a north-facing room more than you intended.
Try Auto in Adobe Camera Raw for a first exposure and contrast pass. Then dial it back wherever it pulls attention away from the design. If Auto opens every dark corner in a restaurant image, compare it with your original. You might want to see more detail at the bar and still keep the ceiling recess dark.
Finish the grade by hand when the client has approved a physical sample, or you need several views to match.
A sky can be convincing in isolation and still look wrong over your building.
Start with the direction and softness of the shadows already in the render. A low sun at the left edge of the sky will give the game away if the building casts a hard shadow toward it. Check the sky’s reflection in the glazing and any wet pavement too.
The wider the view, the more obvious those mismatches get. That applies especially to aerial renders, where you may see several roof planes and the surrounding site in a single frame.
Place a licensed sky below the masked beauty pass. Zoom in at parapets, tree canopies, and the gaps in railings. Refine the mask wherever a bright fringe survives.
If you have a depth pass, use it to limit a light haze layer to the far side of the site. On a view with a precise skyline or a surveyed site photo, manual compositing gives you control over what stays visible and where.
The same stack works in GIMP. Use a layer mask to hold the original roofline, then adjust the sky separately. If your alpha has trouble around glass, mask the sky behind the solid building first and treat the glazing on its own.
Photoshop’s Sky Replacement can create the initial selection and add layers for edge and foreground lighting adjustments. Choose layered output and inspect the mask before you send the image out. This can save time on a clean roofline. For fine branches against a pale sky, start with the renderer’s mask if it gives you a cleaner separation.
What does the client need to see? A person approaching the front door can show the scale of a canopy, but a row of people across the front of the building can obscure the entry sequence you’re trying to explain.
Pick a reference at about the same distance from the camera, such as a door or bench, then check where the feet meet the ground and where the shadow falls. Use the landscape schedule to guide species and placement when planting is part of the proposal.
Place a cutout on its own layer and transform it against your scale reference. Mask it behind anything that crosses in front of it. Add a small contact shadow where it touches the ground, then build any longer cast shadow on a separate layer.
Use a clipped adjustment to match the asset’s brightness or color to the rest of the scene. Save the cutout and shadow as a group if you’ll be moving them during review.
Affinity can handle the same placement with masks and separate adjustment layers. This is a reasonable route when you already have a cutout library and your team can work in Affinity’s native files.
Keep a clean version of the render for rounds where the client wants to see the architecture with fewer people.
In MyArchitectAI’s AI render editing tools, describe the object and its position, e.g., “one adult walking toward the entrance on the paved path to the right of the bench.” As this tool runs in your browser, you can even try the addition on a laptop while your rendering workstation is busy.
Check scale, hands, the contact shadow, and whether the result altered the paving or a nearby door. If the image needs to depict a specific tree from the planting plan, place an appropriate asset yourself or update the scene.
Separate repairs from design revisions and use architectural post-production to test a finish before approval. Once approved, update it in the model so it stays consistent across views.
Clone from a nearby area with the same perspective and lighting for small repairs. If the original finish needs a color correction, use its material mask. If it needs a replacement texture, transform the new texture into the surface plane, then mask the edges and preserve the original shading where it still makes sense.
Inspect every seam where the material meets trim or hardware.
Use GIMP’s Clone or Heal tools for small defects. Photopea is another option if you want to place a texture as a Smart Object and keep its transform editable. Test a saved PSD with whoever will open it next if the handoff depends on editable layers or effects.
Try a tight selection with Photoshop Generative Fill for an isolated distraction, or use MyArchitectAI’s Change textures tool to see how a different finish would look on a surface.
Specify where the change should stop. A prompt such as “fine-grained matte oak on the reception desk front” gives you a more useful comparison than something like, “make the desk nicer.” Zoom in on joints, grain direction, and adjacent surfaces. For a specified slab or tile, use the actual product reference when you build the final scene.
Think about what the client is approving. If they care where the fixtures throw light or how the façade lighting relates to a neighboring property, rerender with the designed fixtures and camera in place. V-Ray Light Mix can help you tune the contribution of lights already rendered, but a change in sun direction may still require another take.
For a controlled day-to-dusk composite, start with a matching sky. Cool the ambient light on a masked adjustment layer, and work on the window bays individually.
If you have matching day and evening exports, use the evening render for the lit glass and spill onto the paving. That’s a better source for the transitions around door frames than painting a glow across the whole opening.
Build a similar composite in Affinity or Photopea using Curves and layer masks. If all you have is a midday export with hard shadows, try a late-afternoon grade first. An image editor can darken those shadows and change their color. Moving them means reconstructing the surfaces they cross.
To relight renders with AI, upload a flattened JPG, PNG, or WebP and choose a preset such as overcast, golden hour, or blue hour.
A relight takes about 30 seconds. Check the new shadows, window mullions, fixture locations, and reflections against the source. You can use the result for a mood discussion, then rebuild the approved lighting in 3D if it needs to hold up across views.
Before the last pass, ask where the image will go. A PDF deck and a mounted presentation board can need different crops and pixel dimensions. For example, an image that fills 20 inches across at 300 pixels per inch needs 6,000 pixels of width. Ask the printer what they require for the actual viewing distance and output process. Set the crop before sharpening so you can judge the edges at the intended size.
Duplicate the master, resize the copy, and sharpen lightly at the output dimensions. Inspect diagonal roof edges and thin window frames at 100%. For web or slide delivery, export an sRGB copy. For print, follow the printer’s format and profile instructions.
GIMP’s Scale Image command works for sizing an image to a specific pixel count. Review the resized file before you export it. Fine railings can become jagged when reduced, and sharpening them again can make the problem more visible.
Use Camera Raw Super Resolution if you need to double the width and height of a supported TIFF or JPEG. Open it in Camera Raw itself for that feature.
For a different job, such as refining flat foliage or soft material detail, try the AI render enhancer on a copy. Start with low Creativity, then inspect repeated tiles, signs, and the edges of joinery against the original. A cleaner-looking finish is only useful if it still represents what the client approved.
Choose based on who will revise the file and what they need to revise. Send one representative layered file through the full review and handoff cycle before switching an active project.
Let’s walk through an illustrative workflow, with the expected checks and edits shown in sequence.
Remember that lobby from the beginning of this guide? The team has exported a 4,000-pixel-wide Enscape render for the client’s presentation board. At review size, the oak around the entrance looks too orange. The client also wants a dusk version to see how visible the entrance might feel after hours.
The daylight image comes first. With the beauty pass open in a layered file, you (or your designer) use the material ID to isolate the oak and reduce its saturation against the finish sample. That correction remains on its own adjustment layer, ready for another revision.
With the finish corrected, attention shifts to the background, where a soft overcast sky replaces the pale original. The alpha export handles most of the separation, though a closer look reveals a few bright remnants between the branches. Cleaning those edges gives the roofline a clearer outline.
The people added for scale come next. Two AI-generated visitors look plausible at first, but their feet seem to hover above the path. Replacing the figures with cutouts and adding contact shadows manually allows the ramp to remain visible, and the original paving is kept intact.
With the daylight version ready, you try a blue-hour preset on a flattened copy. The achieved mood suits the client’s request. During comparison, however, an extra fixture appears beside the entrance. The AI version becomes a reference for a matching dusk render, where the proposed lighting can be shown accurately.
Both images are exported at the board’s required dimensions, with the layered daylight master available for the next review. AI helped the designer assess the evening mood quickly; manual editing brought the daylight image to presentation standard.
Across the six steps, AI saves the most time on first-pass sky selections, quick additions, finish tests, mood studies, and upscaling. Photoshop still wins when a color has to match an approved sample, a composite has to be precise, or several views have to stay consistent.
Start with a change you want to explore, then bring the result into your layered file for review. If you have an approved render and want to see how one surface or a new scene element would look, try MyArchitectAI’s AI render editing tools on a copy of the image.