Chief Architect has long been the go-to 3D design software for residential designers who want power without the steep learning curve.
Originally built as a fast drafting and modeling tool for 2D plans, it has grown into a surprisingly capable visualization tool, complete with its own built-in 3D rendering engine.
While it’s not trying to outgun heavyweights like V-Ray or Corona, Chief Architect’s rendering capabilities are ideal for designers who need quick, fairly realistic visuals directly inside your workflow.
In this guide, we’ll put Chief Architect’s built-in rendering tool in the spotlight, comparing it with AI renderers for speed and ease, and physically-based rendering tools for high-end visualization work.
When it comes to rendering in Chief Architect, there’s really not a single “best” way to do it.
You can create visuals using its integrated renderer, or you can use external CGI programs depending on the level of realism, speed, and control you need.
Each approach serves a different purpose, from quick design presentations to fully photorealistic marketing images.
To help you decide which option fits your workflow best, we’ll compare Chief Architect’s built-in renderer with two major alternatives: AI-based renderers that prioritize speed and automation, and physically based renderers that deliver maximum realism and hands-on control.
Here’s a quick overview of rendering methods we’ll be covering:
Chief Architect’s built-in renderer is simple, fast, and ideal for basic visualization needs. It produces moderately realistic results with clear textures, proper shadows, and ray-traced lighting.
While its output tends to look more polished than photorealistic, it’s still an efficient and reliable tool for quick presentations.
Here’s how it works.
Chief Architect offers nine rendering tools. Each with its own look and settings.
To select one, click the Rendering Technique button (house icon) in the top toolbar.

For realistic results, select Physically Based (Ray Trace) in the Tool Palette that appears on the left-hand side of your screen.
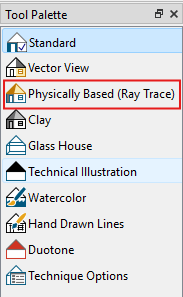
Once selected, open the Technique Options at the bottom of the Tool Palette.
Here, you can adjust Camera Exposure, Global Illumination, and Color Adjustment or enable Ray Tracing for improved light realism.
If you’re wondering what the best Chief Architect render settings are, it really depends on your goal, but as a rule of thumb, use low to medium settings for speed and high or maximum settings for final renders.
A realistic render depends on how complete and detailed your model is. Beyond furniture and accessories, this includes applying the right materials and textures that interact well with lighting. When these elements work together, your scene gains depth, balance, and that convincing lifelike quality every designer aims for.
In Chief Architect, you can enhance your model using:
1. Style Palettes - Control the look of your design by applying predefined or custom styles to objects, rooms, floors, or the entire plan.
Go to File > Library Browser. Under Bonus Catalogs, select Style Palettes or search for “Style Pallette” in the Library Browser search bar.

Browse through available styles — a preview will appear under the Filter Results tab.
Select your preferred style and choose an application mode in the bottom-left corner: Object, Room, Floor, or Plan.

Click the area you want to apply the style to.
2. 3D library - Access a wide catalog of objects including doors, windows, furniture, fixtures, landscaping and even vehicles. Use these to populate your model just like staging a home for an open house. To access the library, go to View > Library Browser.
3. Object Eyedropper - Quickly copy and apply object properties across your model to maintain visual consistency.
This tool is best used for keeping materials, finishes, and styles consistent across similar elements.
To access it, go to Tools > Object Painter > Object Eyedropper. You can also check out Chief Architect’s guide for a quick video walkthrough on how it works.

Lighting brings your model to life. It reveals textures, shapes, materials and colors — essentially everything that makes a render look lifelike. Without light, you basically don’t have a render.
Here are three types of light you’ll be working with in Chief Architect:
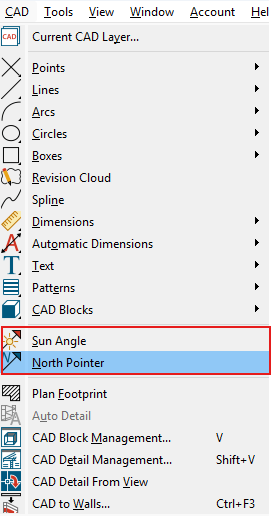
1. Sunlight and moonlight - To simulate sunlight in your model, use the North Pointer tool to define North, then the Sun Angle tool to set your project’s location. (CAD > North Pointer/Sun Angle)
This allows Chief Architect to calculate the realistic sun movement and shadows based on latitude, longitude, date and time, helping you visualize how natural light interacts with your design throughout the day.
2. Light fixtures - For interior renders, light fixtures are essential. They represent the actual lights in your design such as ceiling fixtures, sconces, task lighting and lamps just to name a few.
To add a fixture, go to Build > Electrical Light, then click where you’d like to place it. Clicking on a wall or ceiling automatically creates a corresponding wall or ceiling fixture.

Once lights are placed, fine-tune them by going to 3D > Lighting > Adjust Lights. Here, you can modify the light type, brightness, color and source for more control over how illumination behaves in your scene.
Don’t forget to toggle sunlight in your view, navigate to 3D > Lighting > Toggle Sunlight.
A good render isn’t just about lighting and textures. It’s also about camera control.
The right camera view determines how your audience experiences your design. It should define the perspective, depth, and overall mood of your render.
You can control your view using tools like Move, Rotate, and Gyro. These allow you to navigate around your model and experiment with angles until you find the perfect composition.
Once you’ve found the perfect view, save it. That way, you can easily return to the same angle later without having to recreate it from scratch.
To save a view:
1. Click the Save Active View As button in the upper toolbar.

2. Enter a name for your view, then click OK.
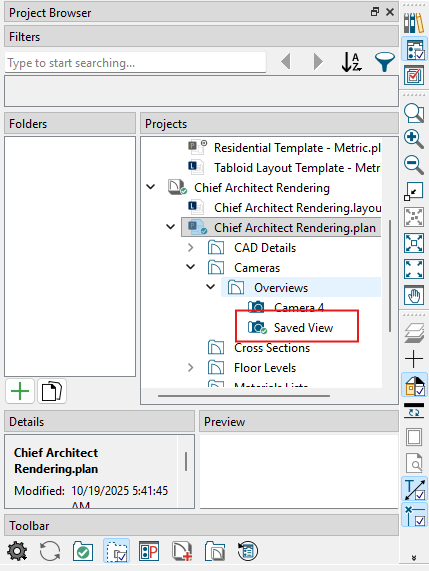
Restore that view at any time by switching to the Floor Plan view and double-clicking the Camera object placed where the view was saved.
Saved camera views are also stored in your Project Browser under the Cameras folder for easy access. (Projects > Chief Architect Rendering > yourfilename.plan > Cameras > Overviews)
Once you’re happy with your final scene, it’s time to export your render.
Go to File > Export and choose from the available export options.
For most presentations, you’ll typically use:
Before exporting, adjust the Export Picture Settings such as width, height and resolution to match your output needs.
When everything’s set, click OK to save your render.
Rendering in Chief Architect is already pretty efficient. But when it comes to realism, it’s nowhere near what you’d call photorealistic.
Reflections, lighting, and textures often feel flat or artificial, especially compared to what you get from professional rendering engines.
That’s why many designers export their models to tools like SketchUp or 3ds Max for more advanced rendering. However, this process adds unnecessary steps and setup time.
If you want both speed and quality without the hassle, AI renderers like MyArchitectAI are a far better choice.
Simply export your Chief Architect view as a JPG, upload it, and get a photorealistic render in a matter of seconds. No high-end hardware or manual tweaking required.
Here’s how it works.
Select a saved camera view from your Project Browser under the Cameras folder. For best results, use the Standard Rendering Technique to ensure accurate shadows and material previews.
Go to File > Export > Export Picture, then save the image as a JPG.

Create a free MyArchitectAI account to get 10 free renders.
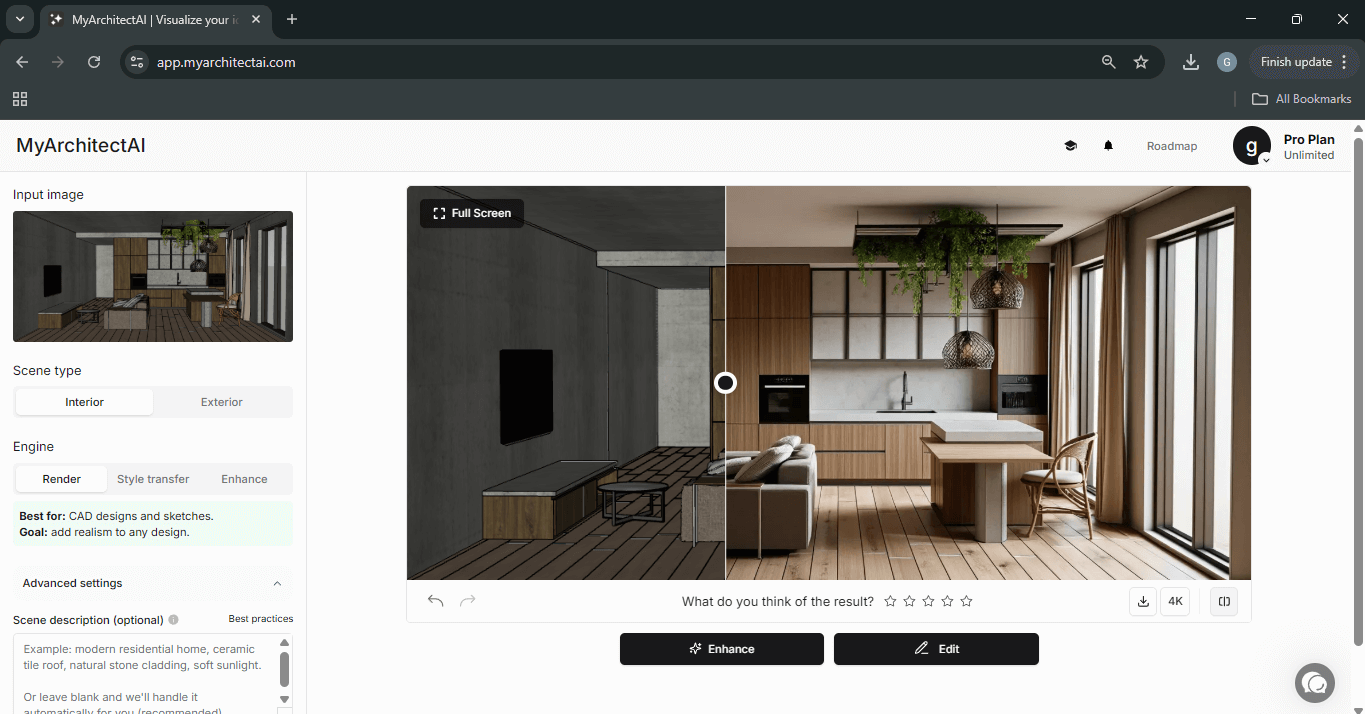
In the Input image area on the top left, drag and drop your exported Chief Architect image, or upload it directly from your computer.
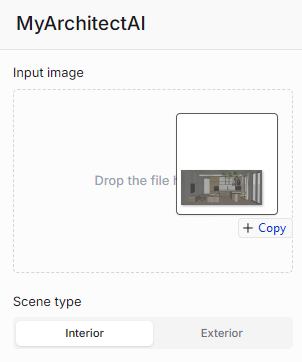
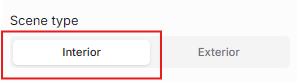
Select whether your render is an Interior or Exterior scene. In this example, we’ll do an interior.
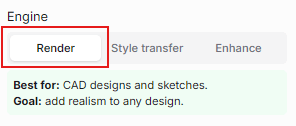
MyArchitectAI offers three rendering engines:
In this example, we’ll choose Render since we’re starting from a raw unrendered image. Only materials were applied to the model and no natural and added lights were installed.
In Advanced Settings, you can add a short scene description to give the AI engine more context. You can specify what materials to use, lighting style, atmosphere, and so on.
Example: “Modern Scandinavian interior with soft morning light coming through the curtains, white oak floors, and matte black fixtures that contrast with the white walls.”

Click Generate to start rendering.
In under 30 seconds, you’ll get a finished, photorealistic render.
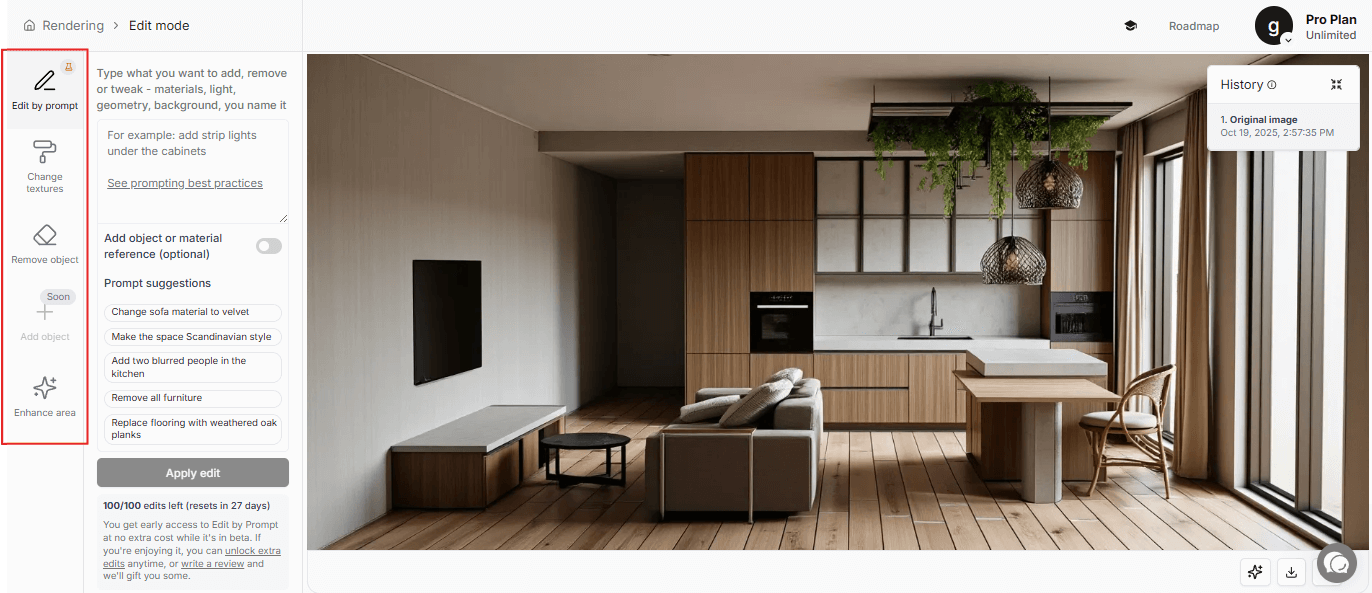
After the initial render, MyArchitectAI allows you to edit your scene directly after rendering. You can also automatically post-process your render by clicking the Enhance button.
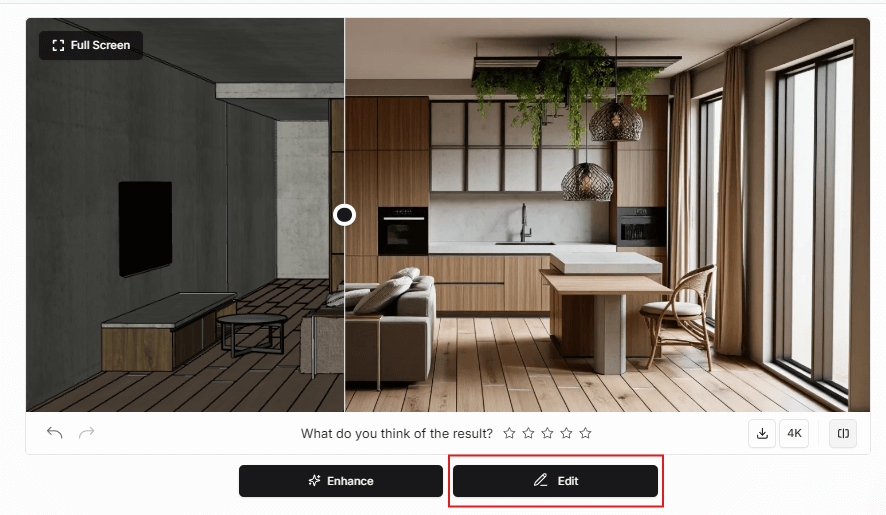
Clicking the Edit button will bring you to Edit Mode where you’ll have access to the following features:
You can even upload a material or object reference to improve the accuracy of your edits.
What makes AI rendering tools superior to the native Chief Architect engine:
Traditional physically based renderers like V-Ray and Corona are still the gold standard for photorealism and highest control.
Even with their steep learning curve, heavy hardware demands, and long render times, these tools still dominate professional visualization. Simply because nothing else comes close to their level of realism and control.
In this section, we’ll focus on V-Ray as an example and how you can use it to render Chief Architect models.
Since Chief Architect does not natively support third-party renderers, so you’ll need to export your model to a compatible 3D format like .3ds or .obj and import it into software that supports V-Ray, typically SketchUp or 3ds Max.
Here’s how it works with SketchUp:
Here’s what you’ll need to render your Chief Architect models with V-Ray:
Since Chief Architect X6, the software has been available natively for Mac, as long as your system meets the requirements. You’ll need an Apple M1 chip or newer (Intel Macs are no longer supported), at least 16 GB of RAM, and 5 GB of free disk space. Check the full system requirements here.
The rendering workflow is the same as on Windows, so you won’t notice any major differences when switching between platforms.
Regardless of the rendering tool you use, these principles are essential for professional-looking results.
If you’re on a budget and only need simple visuals, Chief Architect’s built-in renderer will do the job and is included in your subscription price.
If you’re after competition-level realism and full control (and have the time, hardware, and budget), exporting to a traditional renderer like V-Ray is the way to go.
But if you want the best balance of speed and quality, go with MyArchitectAI. It delivers photorealistic results in seconds, without any expensive gear or technical setup.

.webp)